Node-itᴛᴍ 1.5 is out! Discover the 5 new nodes in the documentation section.
WHAT IS IT?
Node-itᴛᴍ is a collection of powerful nodegroups that solve common shader challenges. A Swiss knife that brings complexity to your 3d work in just two clicks. Its enhancing and speeding up your workflow. It provides powerful building blocks to create, customize, and fix shaders with ease, making it the ultimate solution for shader creation.
Unleash your creativity
Focus on what truly matters and leave the complicated problems behind. Node-itᴛᴍ takes care of them for you. You'll simplify your shader node tree, making it both cleaner and more efficient. You will be abble to fully concentrate on your design.
Need original FX's for your project? Or maybe searching for creative solution for your texture? Just drop in Warp-it.
Need to destroy things? Just drop in Destruct-it.
Need to break instances repetition? Just drop in ColorShift-it.
Don't waste time anymore
Node-itᴛᴍ simplifies your shader workflow and brings your creative vision to life, faster. By proposing various node-based solutions it let you focusing on other tasks.
An ever-growing library
Node-itᴛᴍ features 21 nodegroups. Even more creative solutions are in development, not just for the shader node tree but also for the world shader tree and the compositor!
All futures updates are included.
Library
Node-itᴛᴍ includes various effects such as:






Fits everywhere
How Does It Work? Node-itᴛᴍ node groups are designed for seamless integration into any existing node tree. They are built to be as simple yet flexible as possible. Unlike overly complex node groups with numerous sliders that can disrupt workflows, Node-itᴛᴍ focuses on providing a streamlined, condensed solution that fits effortlessly into any workflow.
Smart combos
While the nodes are designed to be simple and organized, they have the potential to deliver highly complex results. This becomes even more apparent when you start getting creative and combining the node groups. Unlocking powerful combos for greater control over your shaders!
For higher preview, right click and open in a new Tab/Window.
ProximityMask-it + Heat-it gives you a strong combo to control where the heat happens!
ColorPick-it + Colorshift-it give you the ability to select a specific color and shift it across each duplicated instance.
EdgeWear-it + Scratch-it let you scratch your mesh arround its sharp edges.
Cycles+EEVEE
Node-itᴛᴍ has been developed to work in both render engines. Get the best out of it!
For a complete breakdown of the system and its limitations, make sure to read the Documentation section and watch the Tutorials before purchasing.

Documentation
Welcome to Node-it Documentation!Thank you for choosing Node-it. Whether you're a beginner or an advanced artist, this addon provides powerful, easy-to-integrate node groups that can save you time and elevate your work. This documentation is your guide to unlocking the full potential of Node-it. Inside, you'll find detailed explanations, tips, and step-by-step instructions to help you integrate these tools into your projects.
Node-itᴛᴍ Installation Guide
Follow these steps to install and get started with Node-it in Blender:1. After purchasing Node-it, you will receive a download link (from Blender Market or your chosen platform). Click the link to download the .zip file containing the addon.2. Launch Blender.3. Go to the Edit menu at the top left corner of Blender. Select Preferences from the dropdown menu. In the Preferences window, navigate to the Add-ons tab. Click the Install button at the top-right of the Add-ons tab.4. A file explorer will open. Find the Node-it.zip file you downloaded earlier. Select the .zip file and click Install Add-on.5. After installation, Node-it will appear in the list of installed addons. Check the box next to Node-it to activate it.6. Once activated, you can access the Node-it tools in the Shader Editor. Open a shader node tree, and you will see Node-it grouped under the Shift + A menu or in the sidebar (depending on your setup).7. You’re now ready to start using Node-it! Simply drag and drop the desired nodes into your node tree and start creating custom shaders with ease.
Troubleshooting:
If you encounter issues, make sure you are using a compatible version of Blender (typically 4.0x or later). If the addon doesn't appear, try restarting Blender or re-enabling the addon in the preferences.
•How to Use
Node-it is designed to seamlessly integrate into your existing Blender projects.
•Simply open your shader node tree and access the Node-it tools from the Shift + A menu or the sidebar.
Each node group in Node-it serves a specific function, whether it’s adding heat distortion, generating scratches, or creating dynamic masks.
•Select the desired node and click on "Add" to import it into your tree, then customize the settings to suit your project.
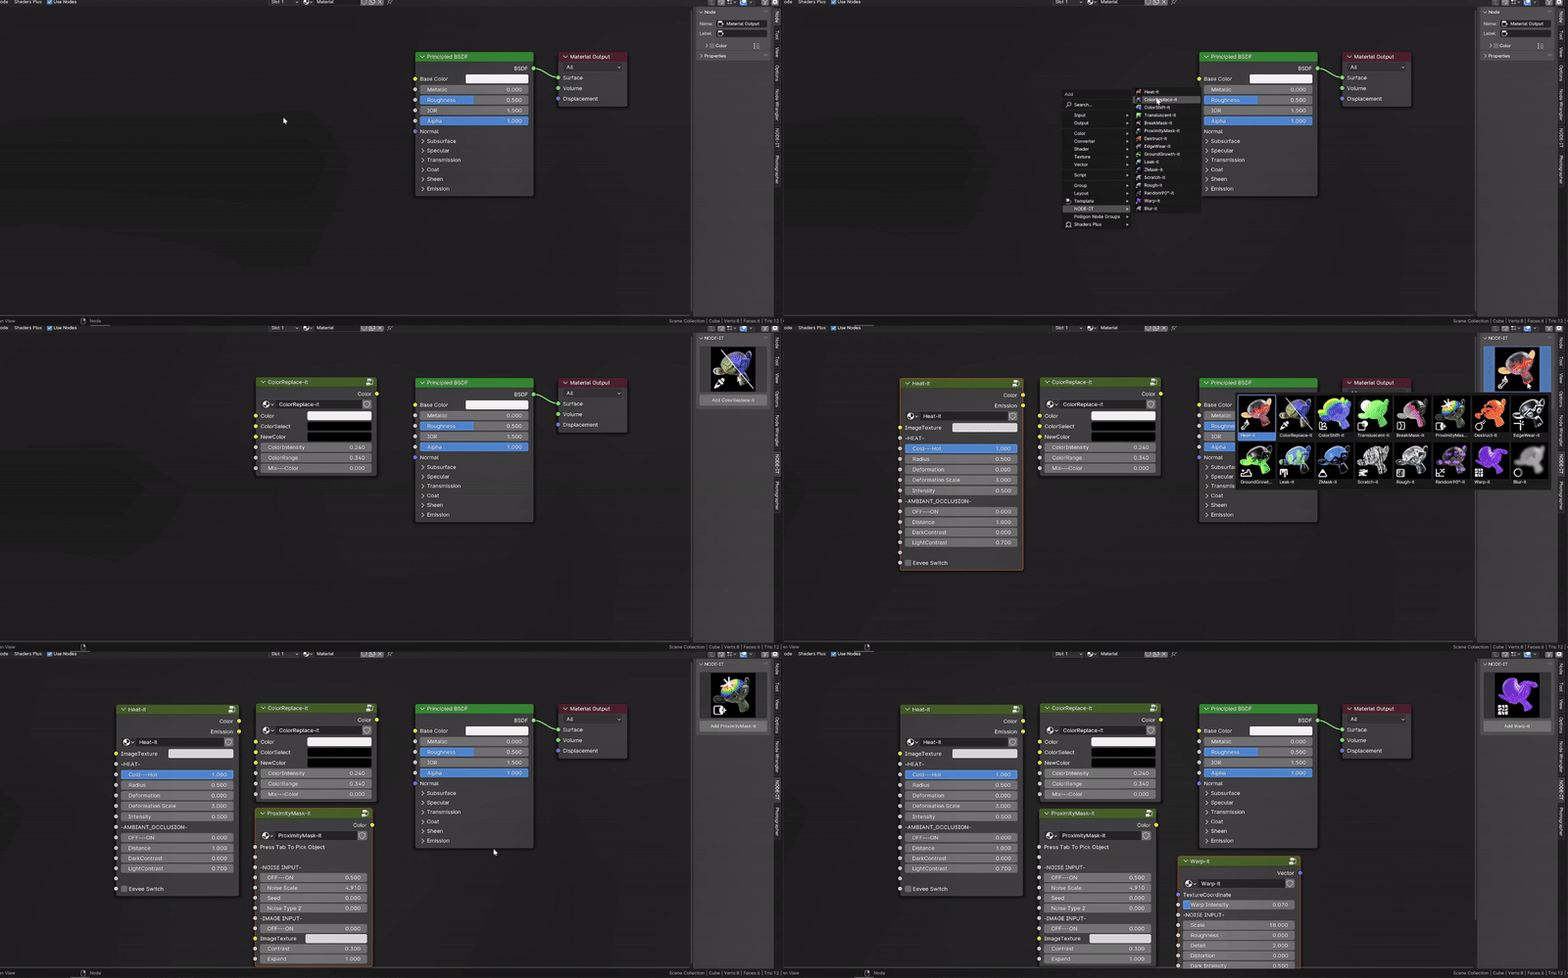
The nodes are intuitive and easy to combine, allowing you to quickly create, modify, or fix shaders with minimal effort. With Node-it, you’ll have all the tools you need to enhance and streamline your shader workflow, no matter the complexity of your scene.
•Tutorial
Node List
The Node List section provides an overview of all the tools included in Node-it. Each node is detailed with its functionality, use cases, and key settings to help you integrate it seamlessly into your workflow.
Updates included
Heat-it
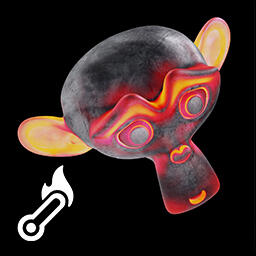
Transform any material with dynamic heat effects. When hot, it creates vibrant glowing gradients, and when cold, it adds subtle thin-film aberrations, delivering realistic thermal transitions to your shaders.
• Placement in the shader
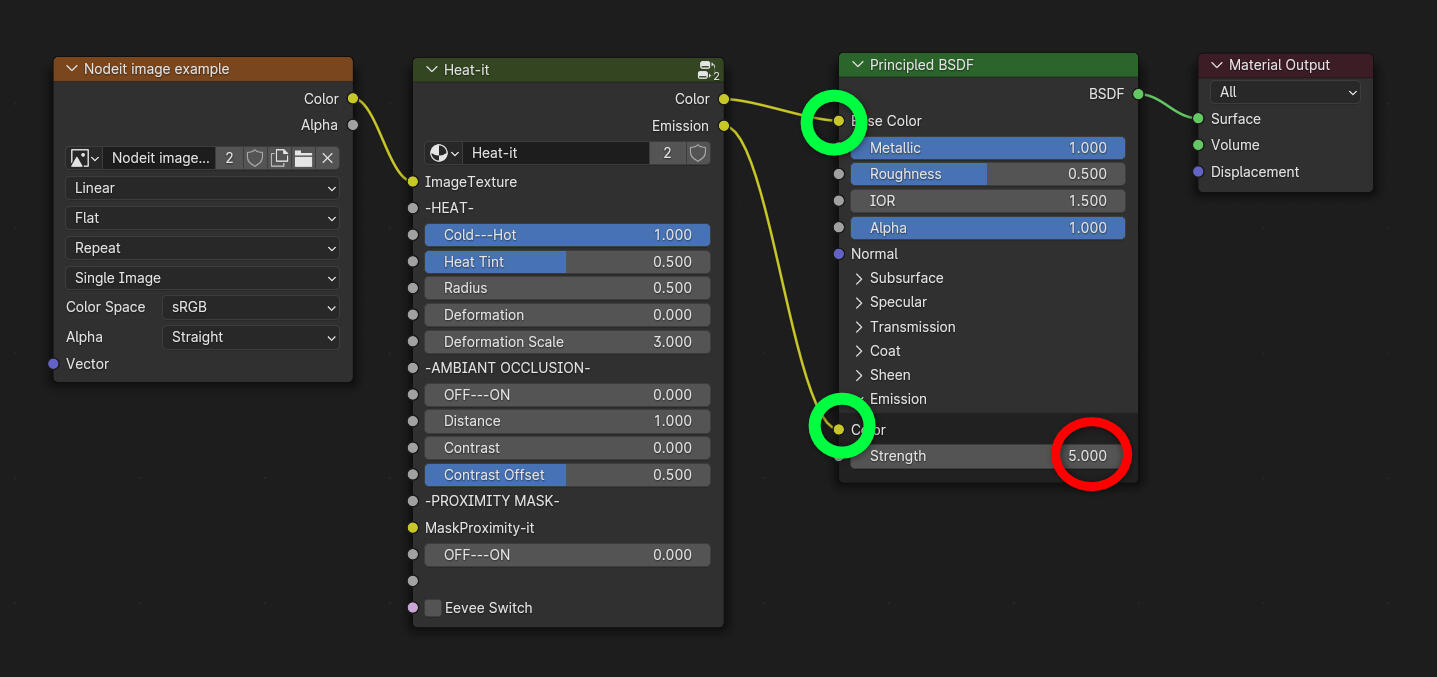
Heat-it comes between your principled BSDF and whatever comes before. Emission goes into the Color of the BSDF emission input. Don't forget to put a positive value in the Strength or you wont have hot emissives glow!
• Usage Tips and Parameters
-HEAT-
• Cold---Hot
Controls the strength of the heat effect. Increasing this value makes the material glow brighter and more intense, simulating a higher temperature.
Tip: Use higher values for objects like engines or furnaces, and lower values for subtler effects like a warm metal surface.
• Heat Tint
Controls the heat Tint intensity. Leaving thin film aberations due to the heat.
Tip: Before getting glowy, the metal changes its structure causing color aberations. You can use that parameter before it start glowing for more realism.
• Radius
Control the size of the effect.
• Deformation
This slider will deform, break the linearity of the effect.
Tip: Works well with the heat tint.
• Deformation scale
Size of the deformation.
-AMBIANT OCCLUSION-
• OFF---ON
Goes from desactivated to activated. Adds hotness relative to other objects proximity. You can control the power of this effect by sliding the factor as you want.
• Distance
Control the size of the ambiant occlusion.
Tip: play with the sliders below to have even more control.
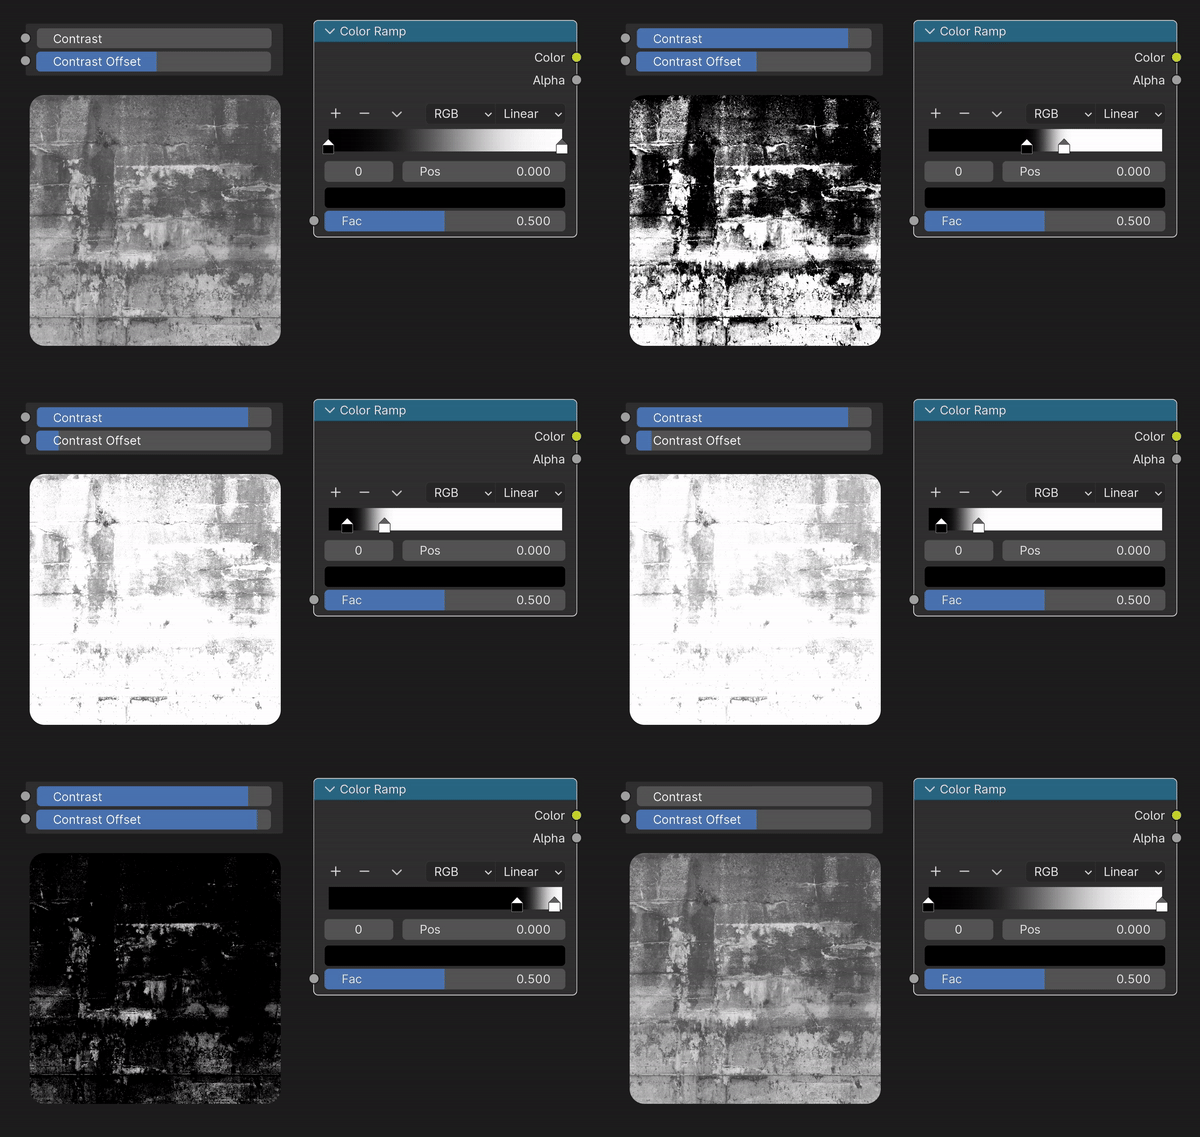
• Contrast
Reduce the distance between the white value and dark value making higher contrasts.
Tip: Check the GIF below.
• Contrast offset
Shift the contrast toward white values or dark values.
Tip: Check the GIF below.

-PROXIMITY MASK-
• MaskProximity-it
Connect the output of the proximitymask-it node into tis input if you want to control the heat with a proximity object.
• OFF---ON
Activates the proximity influence. Goes from desactivated to activated.
12. Eevee Switch
Switch the node to a version optimised for eevee.
• Advanced/Creative Applications
• Interactive Effects in Animations
Use the heat map dynamically to simulate temperature changes over time. For example:
Animate the heat effect spreading across an engine exhaust as it powers up.
Mimic a cooling effect by reversing the gradient, transitioning from glowing heat to subtle cool hues.• Stylized Visuals
Explore artistic approaches by exaggerating the heat colors. Use this to create a glowing sci-fi material or surreal environments with glowing, heated objects.• Environmental Interactions
Combine Heat-It with proximity-based nodes like MaskProximity-It. This allows objects to "heat up" based on their interaction with other elements in the scene, such as:
A glowing trail effect for objects passing through a specific area.
Localized heating on objects exposed to a flame or laser.• Game-Ready Assets
When creating assets for real-time rendering, use Heat-It to quickly add dynamic and adjustable heat effects to materials like weapons, machinery, or environmental props (e.g., lava rocks or molten surfaces).
ColorReplace-it
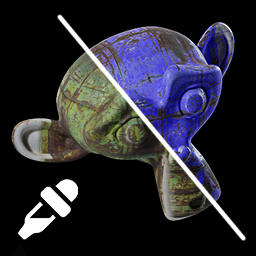
Easily replace specific colors in Blender. Select a color to isolate, then swap it with your desired shade!
• Placement in the shader
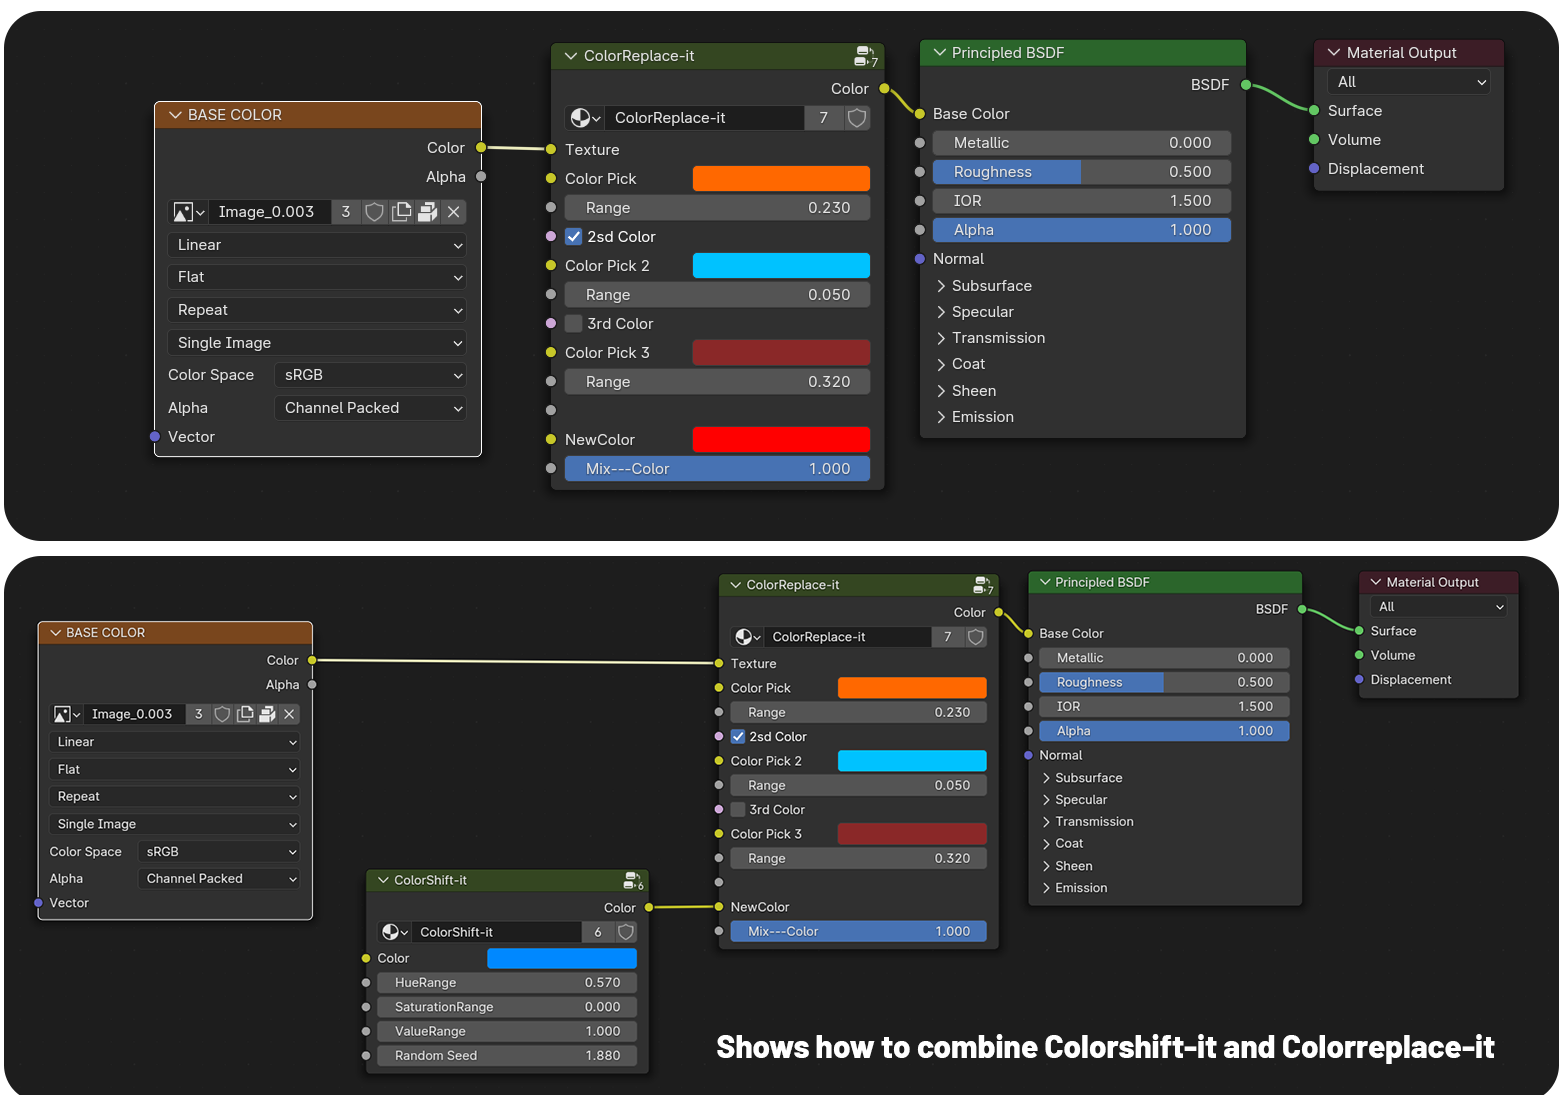
ColorReplace-it comes before the principled BSDF. Connect your image texture in the texture slot input.
• Usage Tips and Parameters
• Image Texture
Connect your texture right here.
• Color Pick
Click on the color and eyedrop the desired color.
Tips:
• Press "M" to mute the node while color picking. Otherwise the replaced color might already be covering the one you want replaced.
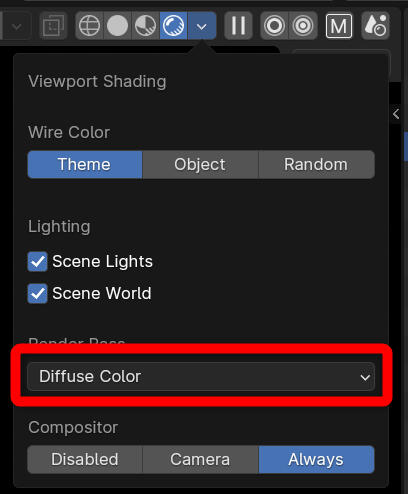
• For even more accuracy you can change the display settings of your 3D viewport by changing the render pass to "diffuse color" thus displaying flat albedos.
• Range
Controls the tolerance of the color selection.
• 2nd Color
Enable the 2nd color selection.
• Color Pick 2
For more accuracy you can select an other color. it will be added to the current color selection.
• Range
Controls the tolerance of the color selection.
• 3rd Color
Enable the 3rd color selection.
• Color Pick 3
For more accuracy you can select an other color. it will be added to the current color selection.
• Range
Controls the tolerance of the color selection.
• New Color
Choose the New color that will replace the one you picked. You can also plug image textures.
• Mix---Color
Change between a hard mix replacement of your color, or with a more subtle change similar to the overlay/Color/hue effect in Photoshop.
Tips: You can enter in the nodegroup and change the mix type within the "mix color" node for more creative replacement
• Advanced/Creative Applications
• Remove Unwanted Colors
Baked textures from photogrammetry frequently include shadows, which can limit their reusability. Use ColorReplace-It to target darker shadow areas and replace them with lighter or neutral tones.
ColorShift-it
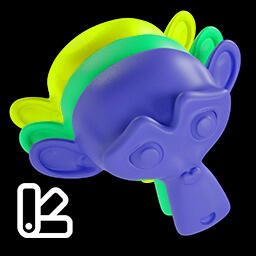
Add color variation to your instances. Each duplicated object shifts its color based on your desired intensity!
• Placement in the shader
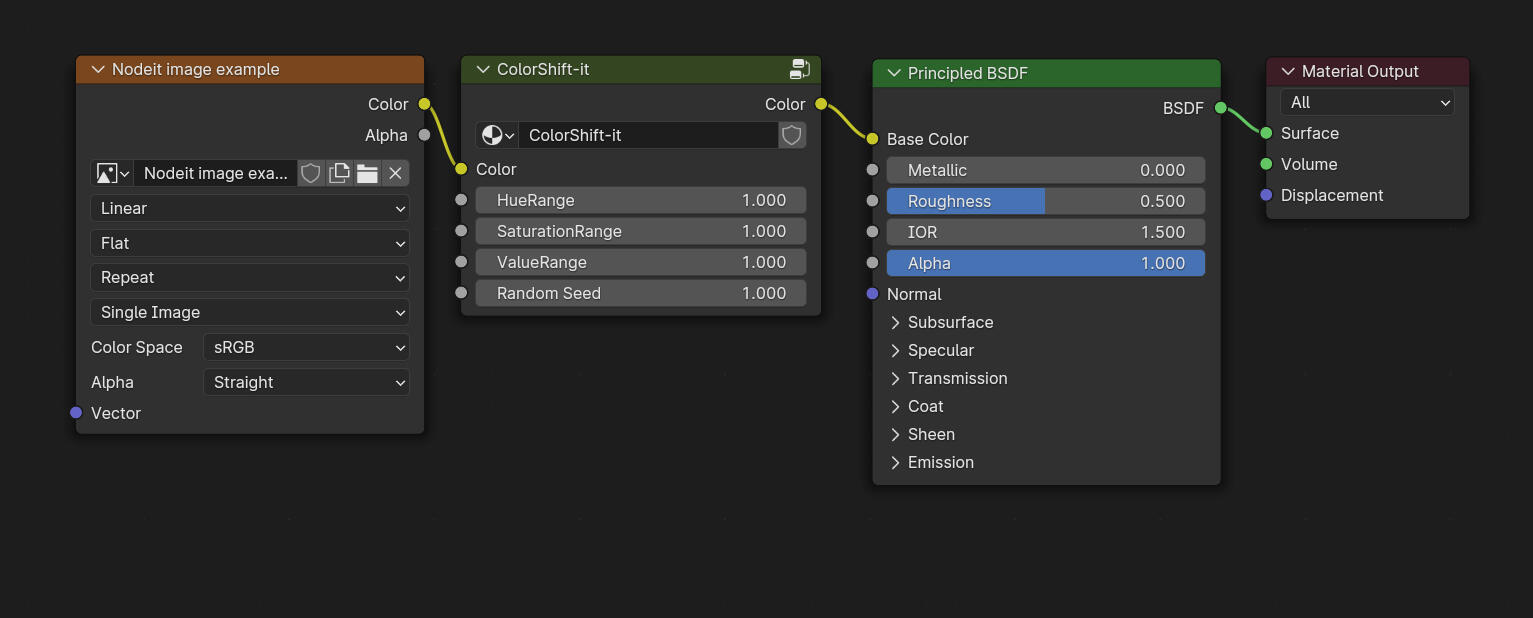
ColorShift-it comes before the principled BSDF. Connect your image texture in the texture slot input.
• Usage Tips and Parameters
• Color
Connect your texture if you have one.
• Hue Range
Controls how much the node shifts the hues.
• Saturation Range
Controls how much the node shifts the saturation.
• Value Range
Controls how much the node shifts the values.
• Random Seed
Offsets the final output. It randomise the result.
• Advanced/Creative Applications
• Procedural Crowd Coloring
Use ColorShift-It to create diverse, visually rich crowds or environments. Assign subtle color variations to individual characters in a crowd, like different clothing hues.
or add distinct color tones to leaves on trees or flowers in a field to break uniformity. All controlled in one shader across all meshes.• Game Asset Diversity
When preparing assets for game engines, use ColorShift-It to create subtle color variations on repeated objects, such as barrels, crates, or architectural elements, to avoid repetitiveness while keeping optimization intact.• Targeted Material Adjustments
Use ColorReplace-It combined with ColorShift-it to make isolated edits to a specific area of a shader without disrupting the entire material.
ProximityMask-it
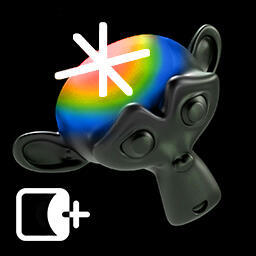
Easily create a mask driven by an empty, with the object's proximity defining the mask's influence.
• Placement in the shader

ProximityMask-it is acting as a black and white mask and most of the time is plugged in the factor of mix nodes.
• Usage Tips and Parameters
• Press Tab To Pick Object
In Order to enable the proximityMask node you need to press Tab to enter in the nodegroup. Once in you should spot this area ▼
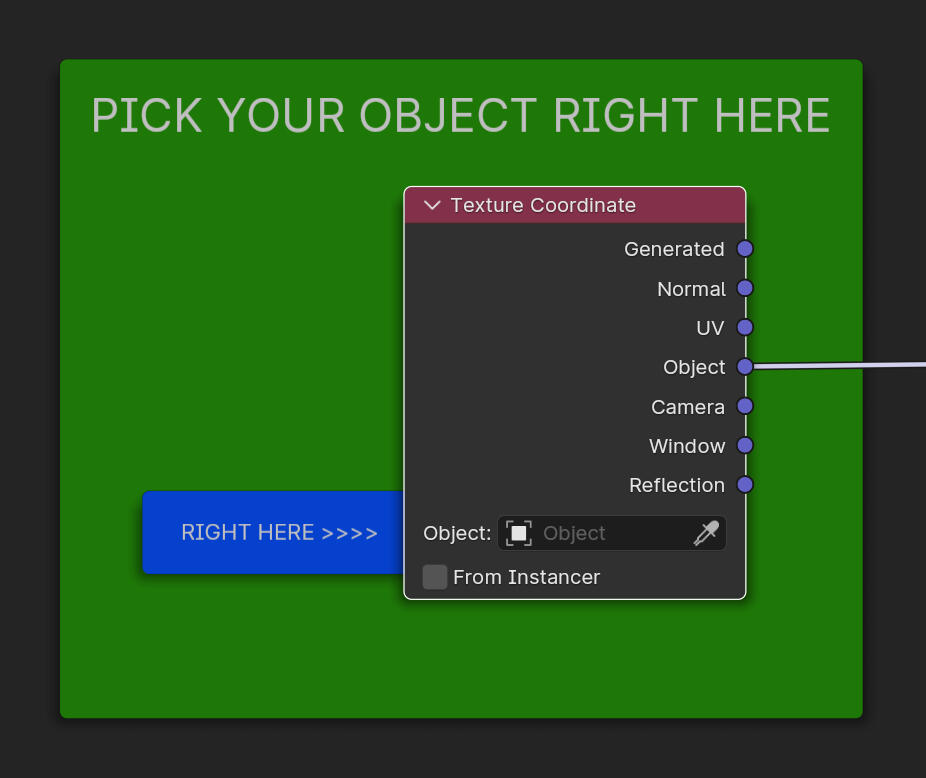
In the Object section of the text.Coordinate node pick an object to drive the proximity. (prioritize Empties since they wont appear in renders)
-NOISE BREAK-
• OFF---ON
If OFF (Slider to 0) the gradient of the mask will be smooth linear, if ON (slider to 1) You'll have a noise break. Better than an on and off tickbox you can adjust the quatity of noise.
Tips: Push the OFF---ON to the right to be able to see your image texture in -IMAGE INPUT-
• Noise Scale
Size of the noise breaking the smooth gradient.
• Seed
Shifts the noise for different results.
• Noise Type 2
Different type of noise.
-IMAGE INPUT-
• OFF---ON
Activates the ability to use custom image or procedural noise instead of the ones proposed above.
WARNING: Push the OFF---ON slider of the -NOISE BREAK- to the right to be able to see your image texture
• Image Texture
This is where you connect your image, or procedural noise.
WARNING: Push the OFF---ON slider of the -NOISE BREAK- to the right to be able to see your image texture
• Contrast
Increases the contrast of the overall mask.
• Expand
Expands the mask radius.
Tips: You can also scale up the empty size, even on 1 axis only.
• Advanced/Creative Applications
• Localized Material Effects
Use ProximityMask-It to create localized effects based on an object's distance to the mask-driving empty:
Simulate burn marks or scorching effects on a surface near a heat source.
Add frosting effects on glass or metal that appear as an object "freezes" when approached.
Generate wetness zones around puddles or simulate splashes on nearby surfaces.• Dynamic Animation Effects
Animate the empty driving the proximity mask to create evolving effects:
Energy effects: Reveal glowing patterns or sparks trailing the movement of an energy orb.
Shockwave visualization: Expand the proximity mask outward to show the effect of an explosion spreading across the surface.
Magic effects: Show spell casting with dynamic patterns emerging on surfaces near the character's hands or staff.• Interactive Scene Features
Integrate ProximityMask-It into scenes to trigger visual responses to proximity:
Gameplay effects: Highlight objects or areas when a player or camera is nearby, useful for interactive games or walkthroughs.
Dynamic decals: Create dirt or mud splashes around objects as they interact with the environment.
Proximity-driven highlights: Change the material properties of objects (e.g., glowing edges, shimmering surfaces) when the user-controlled object approaches.• Destruction and Weathering Effects
Combine ProximityMask-It with other nodes to simulate progressive material degradation:
Rust spreading: Create a rust effect that appears to grow around a driving empty, perfect for aging machinery or props.
Erosion: Simulate areas of a material being worn down near an interacting object, such as footsteps eroding terrain or waves eroding cliffs.
Localized wear: Combine with EdgeWear-It for more control over where wear and tear occurs.• Guided Growth and Nature Effects
Use ProximityMask-It to simulate natural growth or environmental interactions:
Vegetation spread: Show moss, grass, or vines spreading around structures as the mask moves closer.
Snow buildup: Control where snow accumulates on an object, such as heavier deposits around a center point.
Burn trails: Simulate trails of charred ground following the path of a fire or lava flow.• Procedural Art and Animation
Explore abstract or stylized designs by animating the proximity mask:
Reveal patterns: Use ProximityMask-It to uncover hidden textures or create visual reveals in animations.
Dynamic painting: Animate the mask for a paintbrush effect, as if painting a texture across the surface in real-time.
Reactive materials: Make materials pulse or shift based on the proximity of objects in a creative or interactive scene.ProximityMask-It is a versatile tool that excels in both realistic and fantastical shader workflows. Its ability to create dynamic, interactive, and localized effects makes it an indispensable node for procedural artists and shader developers
BreakMask-it
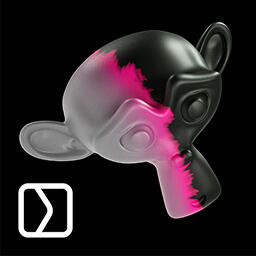
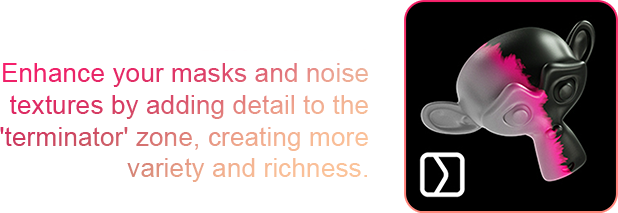
Enhance your masks and noise textures by adding detail to the 'terminator' zone, creating more variety and richness.
• Placement in the shader
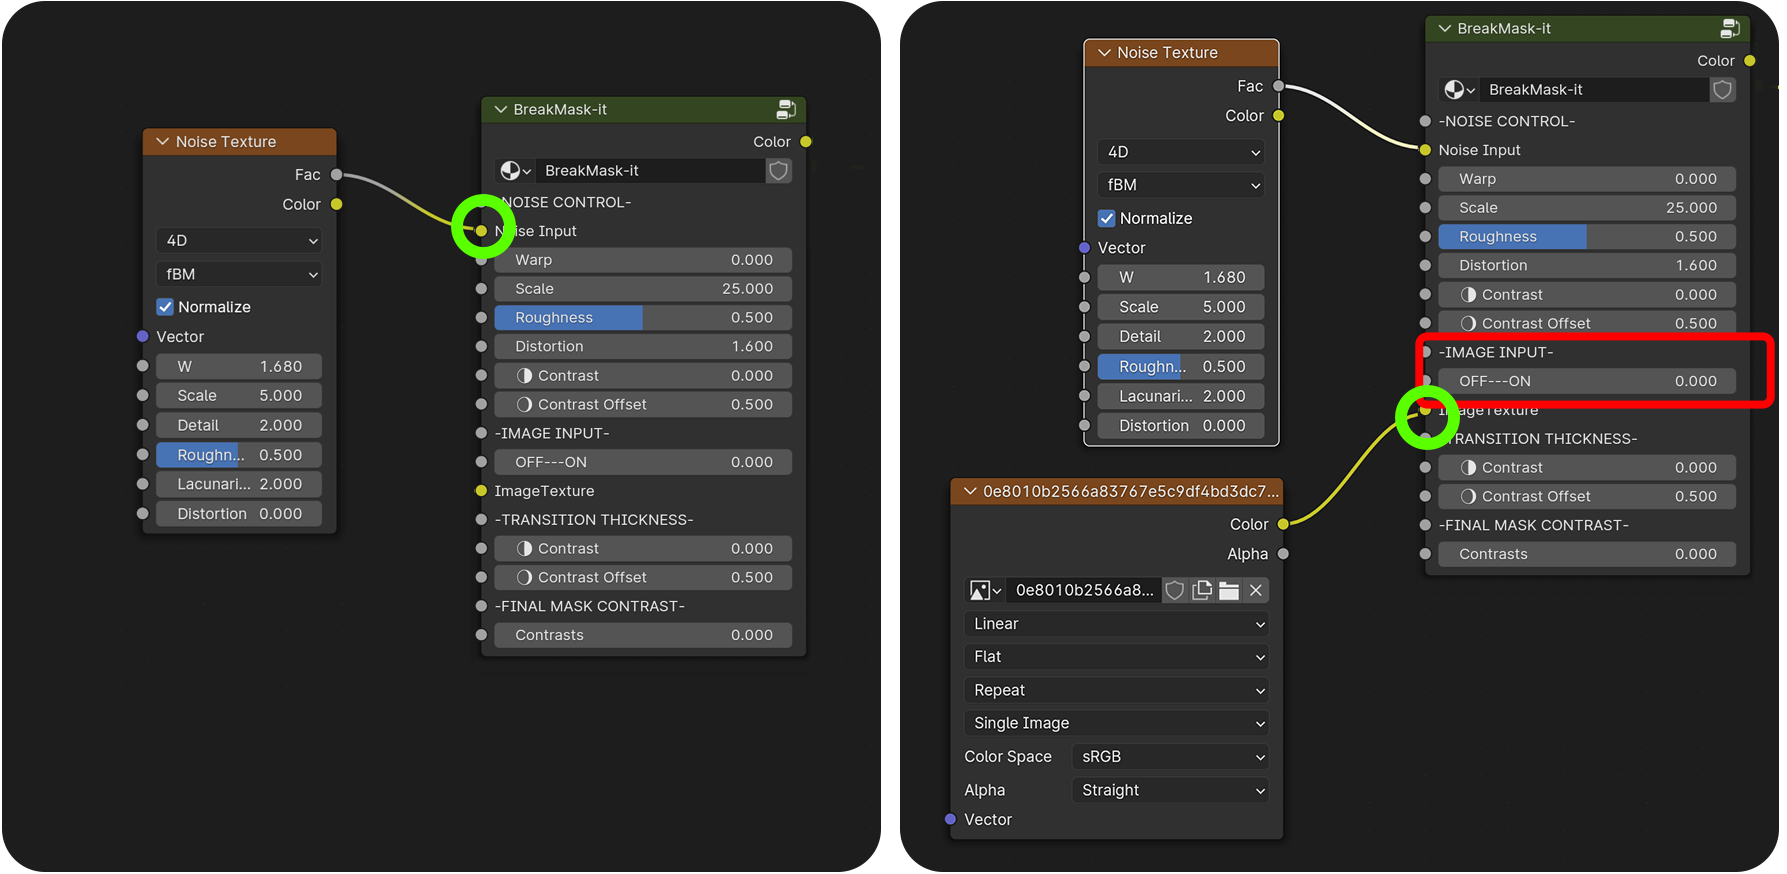
BreakMask-it needs a noise texture or image in order to work.
• Usage Tips and Parameters
• Image Texture
Connect your texture.
-NOISE CONTROL-
• Warp
Warps the noise arround the border of your mask.
• Scale
Size of the noise break.
• Roughness
Adds details to your noise.
• Distorsion
Distort the noise.
• Contrast
Reduce the distance between the white value and dark value making higher contrasts.
Tip: Check the GIF below.
• Contrast offset
Shift the contrast toward white values or dark values.
Tip: Check the GIF below.

-IMAGE INPUT-
• Image Texture
Use an image texture instead of the built in noise.
-TRANSITION THICKNESS-
• Contrast
Reduce the distance between the white value and dark value making higher contrasts.
Tip: Check the GIF above.
• Contrast offset
Shift the contrast toward white values or dark values.
Tip: Check the GIF above.
-FINAL MASK CONTRAST-
• Contrasts
Increases the contrast of the entire node effect.
• Advanced/Creative Applications
• Planetary Clouds and Atmospheric Effects
Use BreakMask-It to create unique cloud formations or surreal planetary atmospheres:
- Add weird, organic clouds with uneven density for alien planets.
- Combine with noise textures to create atmospheric bands or swirling patterns for gas giants.
- Simulate dynamic storm systems by animating the break areas across a planetary shader.• Dynamic Surface Details
- Add cracked paint, peeling layers, or damaged plaster for aged and weathered looks.
- Enhance fabric tears and rugged textiles by breaking uniform noise patterns.
Destruct-it
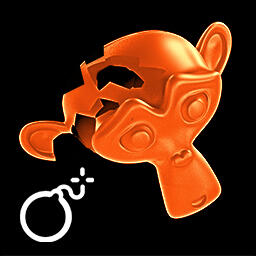
Control destruction with an empty’s proximity, creating holes in your mesh. Perfect for damaged objects or torn fabrics.
• Placement in the shader
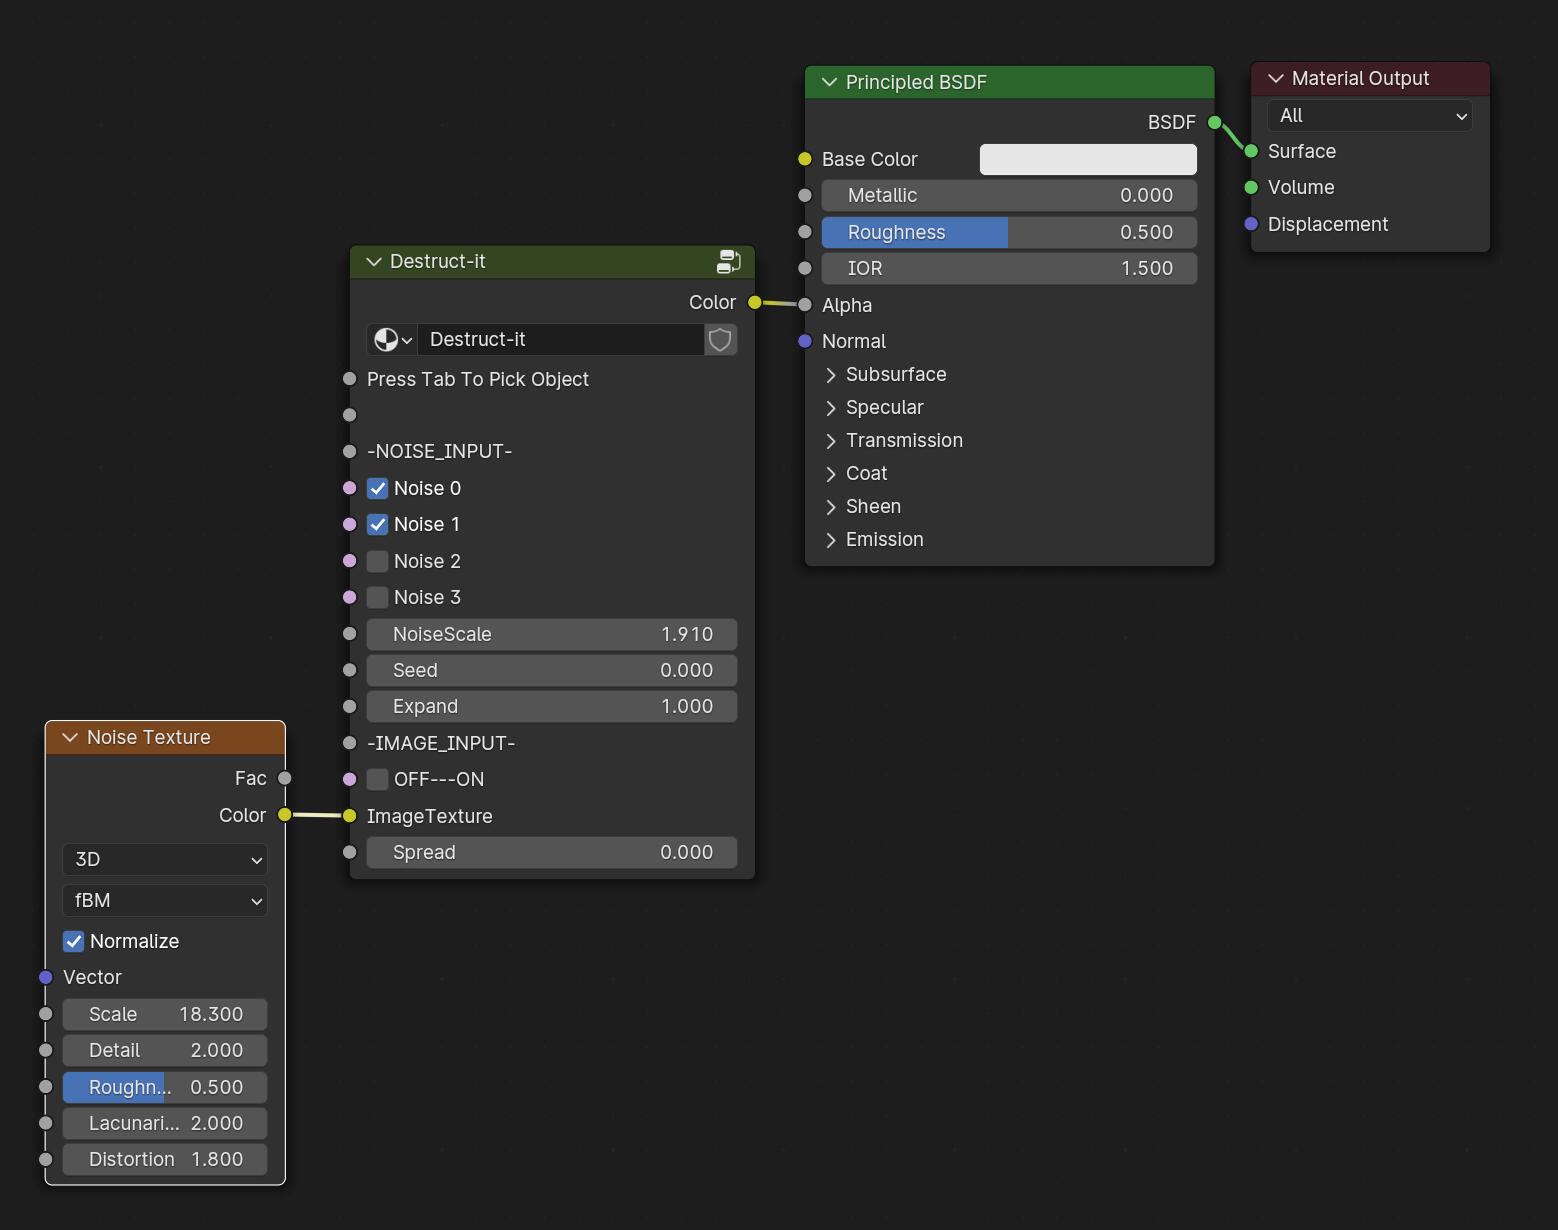
Destruct-it is made to work as an alpha.
• Usage Tips and Parameters
• Press Tab To Pick Object
In Order to enable the proximity of the Mask you need to press Tab to enter in the nodegroup. Once in you should spot this area ▼

In the Object section of the text.Coordinate node pick an object to drive the proximity. (prioritize Empties since they wont appear in renders)
-NOISE INPUT-
By default this nodes comes with an tech/scif-ish procedural noise.
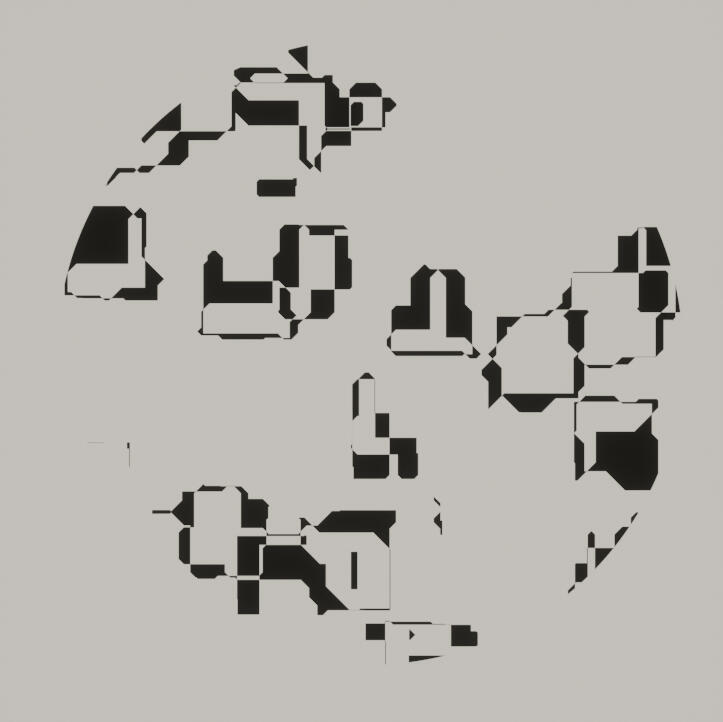
• Noise 0
Organic type of noise.
Tip: Great to add worn holes in fabrics.
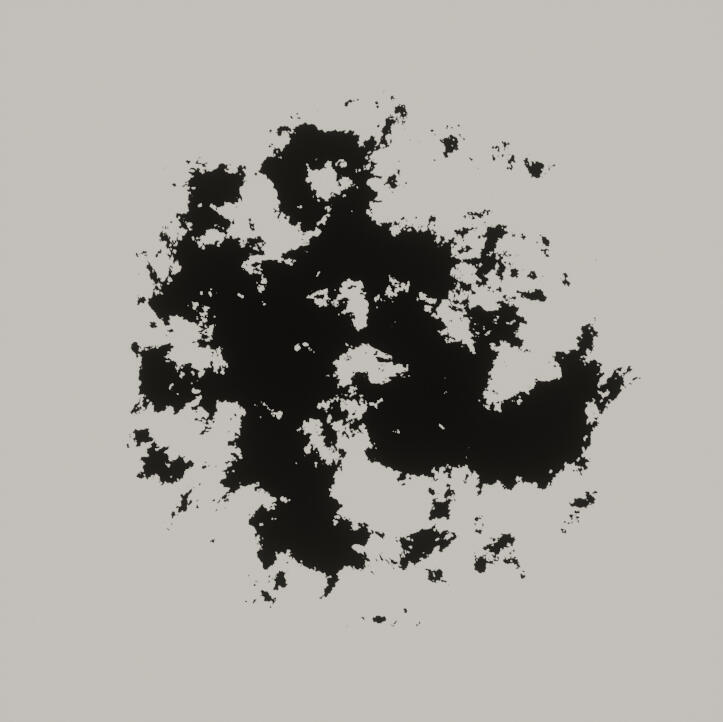
• Noise 1
Sparkly type of noise.
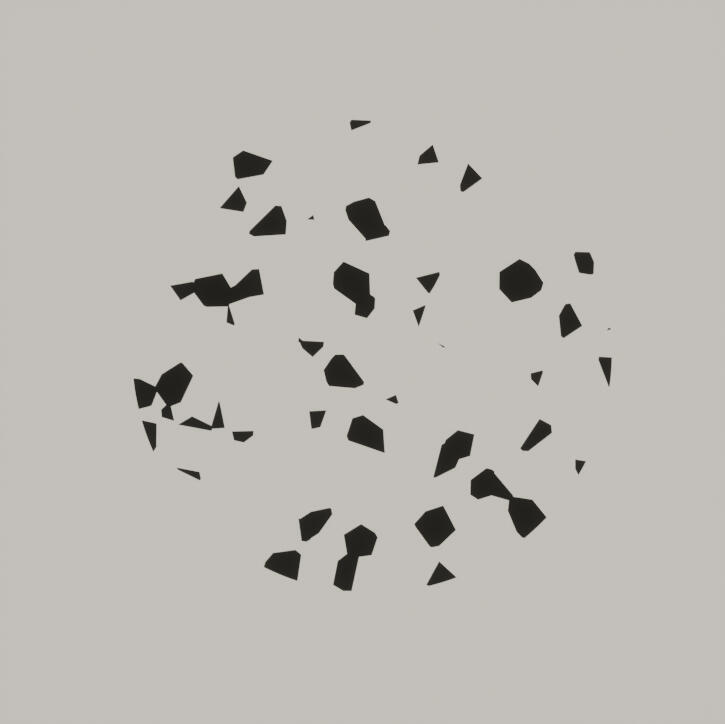
• Noise 2
Digital type of noise.
Tip: Great when you start scaling your empty on 1 axis, distorting the noise..
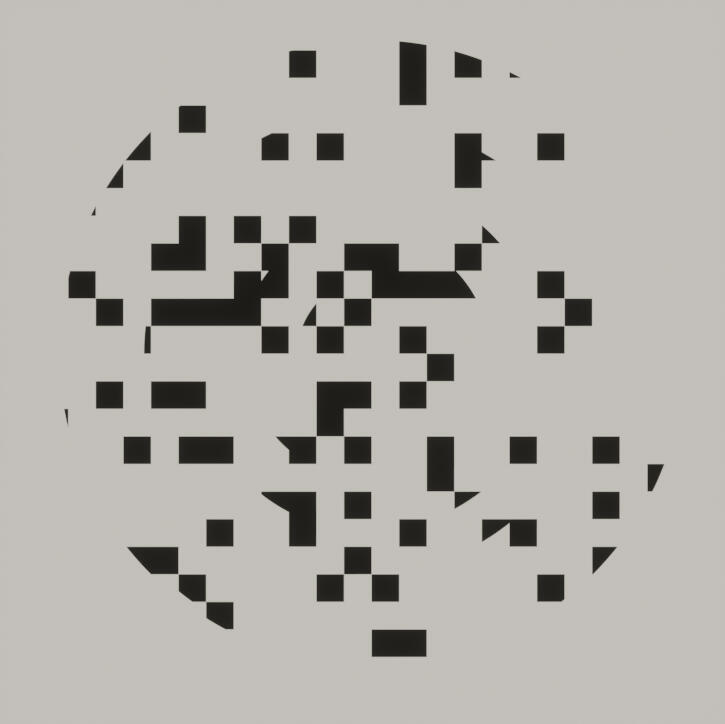
• Noise 3
Even more digital with breaks.
Tip: makes a great base if you want to make holes in scifi vehicles hulls. Great when you start scaling your empty on 1 axis, distorting the noise.
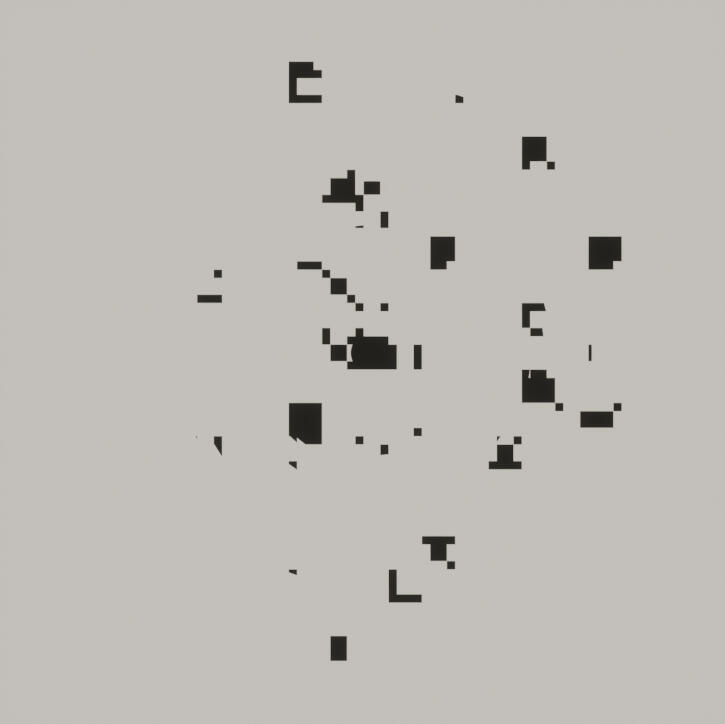
• Noise Scale
Size of the noise.
• Seed
Location of the noise.
• Expand
Make the mask bigger.
-IMAGE INPUT-
• OFF---ON
Activates the ability to use an image texture of your choice.
• Image Texture
Use an image texture instead of the built in noise.
• Spread
Increases the dark contrasts from the center. Cool effect, just try it :)
• Advanced/Creative Applications
• Torn Fabrics and Worn Materials
- Add rips, tears, or frays to fabrics for damaged clothing, curtains, or upholstery.
- Create battle-damaged armor or flags with shredded edges and holes.
- Use animated masks to show materials being ripped apart or unraveling in real time.
• Sci-Fi Energy Decay or Corruption Effects
- Simulate energy corrosion or disintegration by animating spreading holes or cracks.
- Create alien infections or growths consuming a surface by combining with procedural textures.
- Use with glowing emission textures to make energy burns or melting metal effects.
Leak-it
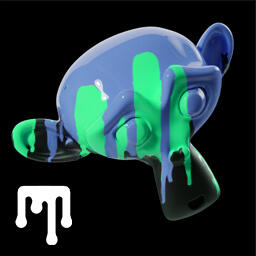
Add realistic liquid drips and leaks to any shader, with full control over length, width, and appearance.
• Placement in the shader
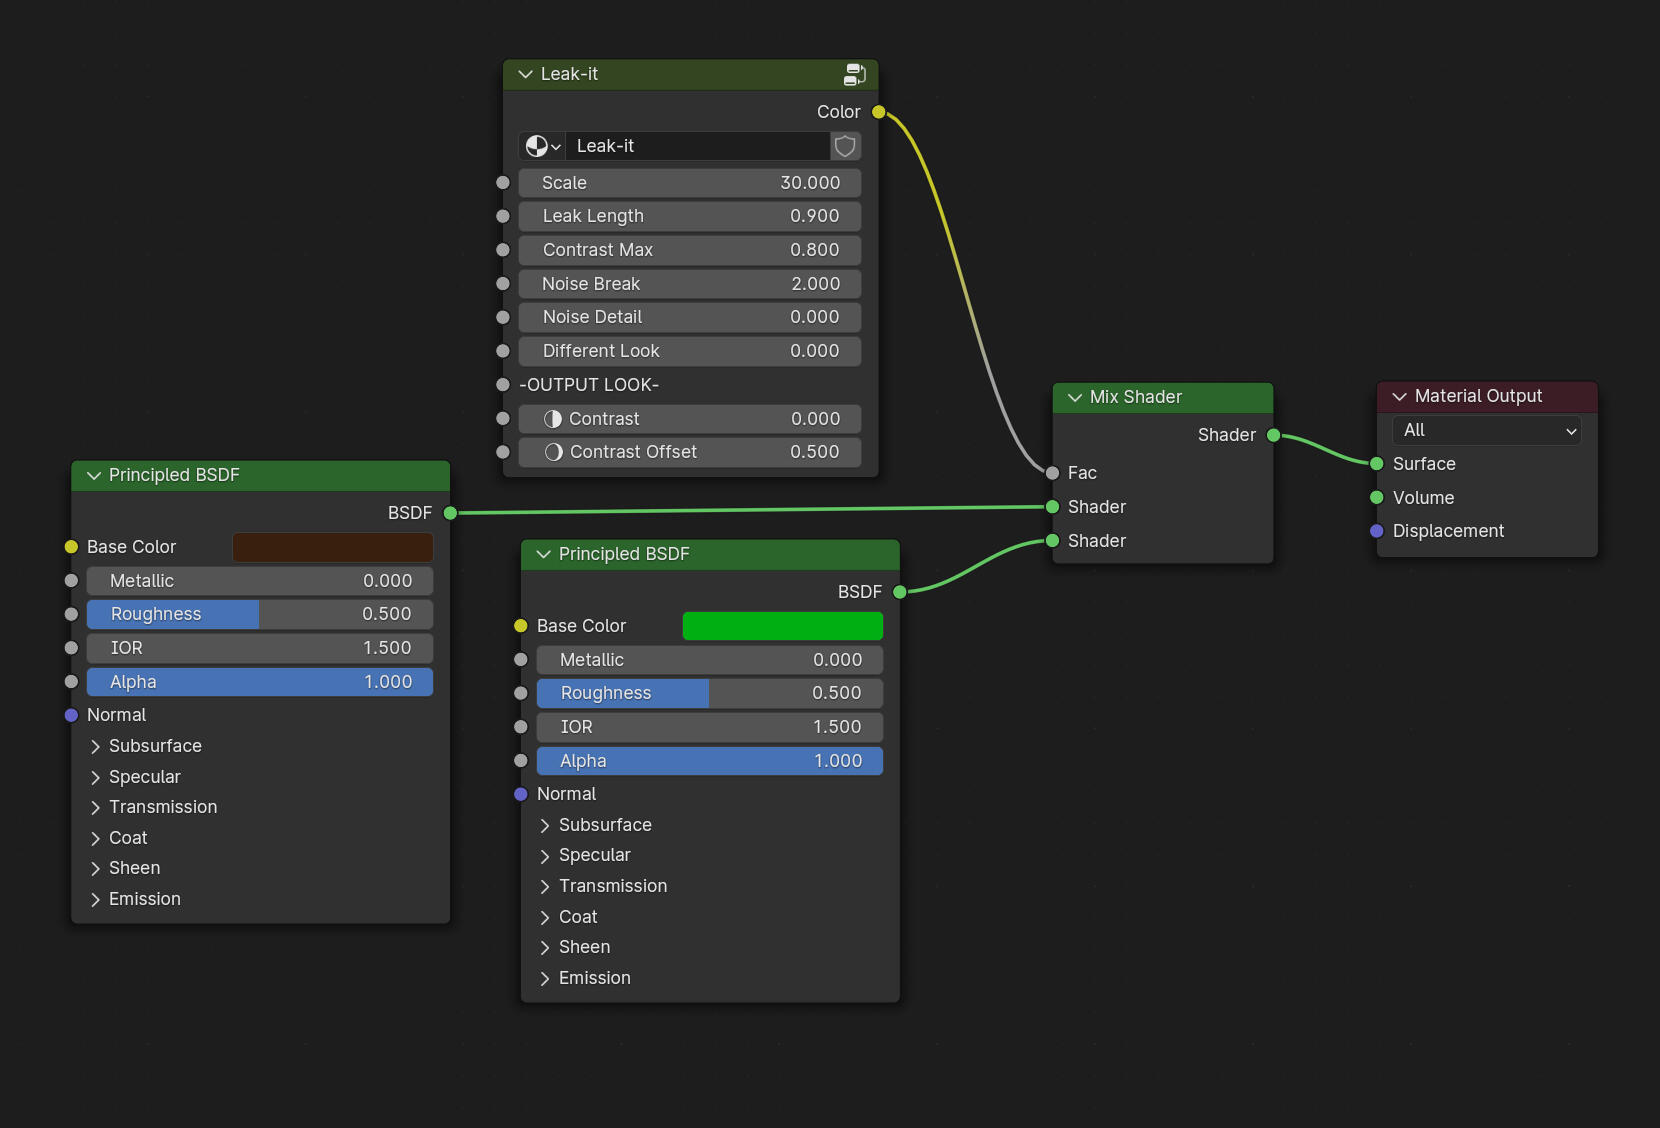
Leak-it is acting as a mask, usually comes in the Factor on mix nodes like the Mix Shader or Mix Color.
• Usage Tips and Parameters
• Scale
Change the frequency of the leaks, making them more frequent and narrower.
• Leak Length
Controls the length, height of the drips.
• Contrast Max
Add a first hard pass of contrast.
• Noise Break
Add a big scale detail noise to the mask.
• Noise Detail
Add micro detailed noise for more realism.
• Different Look
Changes the look of the drips.
-OUTPUT LOOK-
• Contrast
Reduce the distance between the white value and dark value making higher contrasts.
Tip: Check the GIF below.
• Contrast offset
Shift the contrast toward white values or dark values.
Tip: Check the GIF below.

• Advanced/Creative Applications
• Weathering and Aging Effects
- Simulate rain streaks and water stains on walls, windows, or metal surfaces for realistic weathered looks.
- Add rust drips flowing down from bolts, cracks, or edges to emphasize age and decay.
- Create grime trails on statues, buildings, or urban scenes to suggest exposure to the elements.
ZMask-it
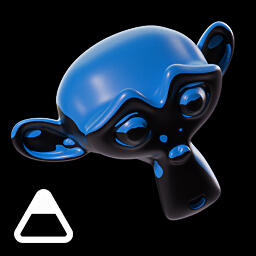
Generate masks based on normal angles, perfect for adding moss, grass, snow, and other surface effects.
• Placement in the shader
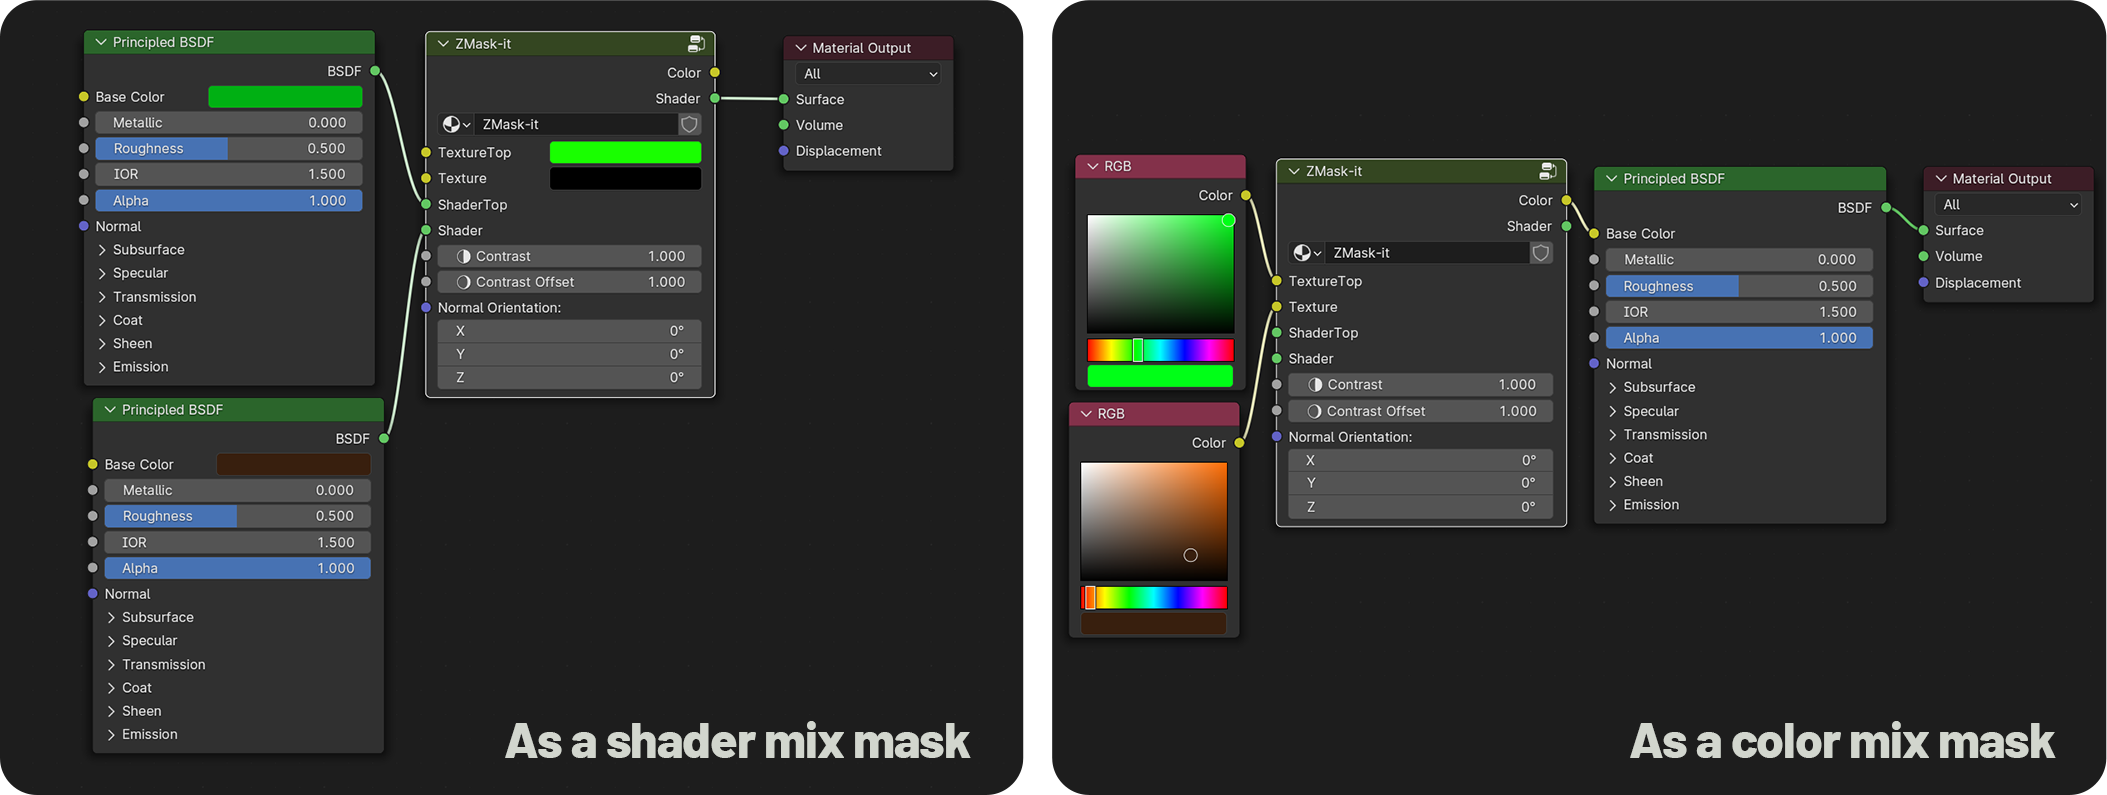
ZMask-it is acting as a MIX mask.
• Usage Tips and Parameters
• Texture Top
Connect the albedo that will be toward the top part.
• Texture
Albedo facing down.
• Shader Top
Connect the shader that will be toward the top part.
• Shader
Shader facing down.
• Contrast
Reduce the distance between the white value and dark value making higher contrasts.
Tip: Check the GIF below.
• Contrast offset
Shift the contrast toward white values or dark values.
Tip: Check the GIF below.

• Normal Orientation
Change the mask angle for more control.
*Tip: Snow will not deposit necessarily on Z only depending on the wind force. You can introduce that by changing the angle of the mask. *
• Advanced/Creative Applications
• Environmental Effects
- Simulate snow buildup on upward-facing surfaces like rooftops, rocks, or trees for winter scenes.
- Add moss or grass growth on flat or sloped surfaces to create realistic nature-inspired materials.
- Apply dust or sand accumulation for desert or aged environments.• Selective Shading and Weathering
- Highlight sunlit areas or shadowed zones based on orientation for realistic lighting effects.
- Create wet vs dry zones for rain-soaked ground or dripping water effects.
- Combine with Edgewear-It to enhance weathered edges and crevices with procedural masks.
EdgeWear-it
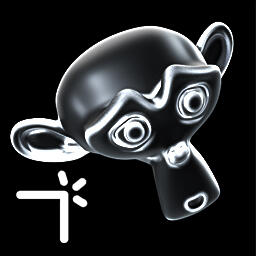
The essential edge wear effect mask to add realism by making your shaders look worn and weathered.
• Placement in the shader
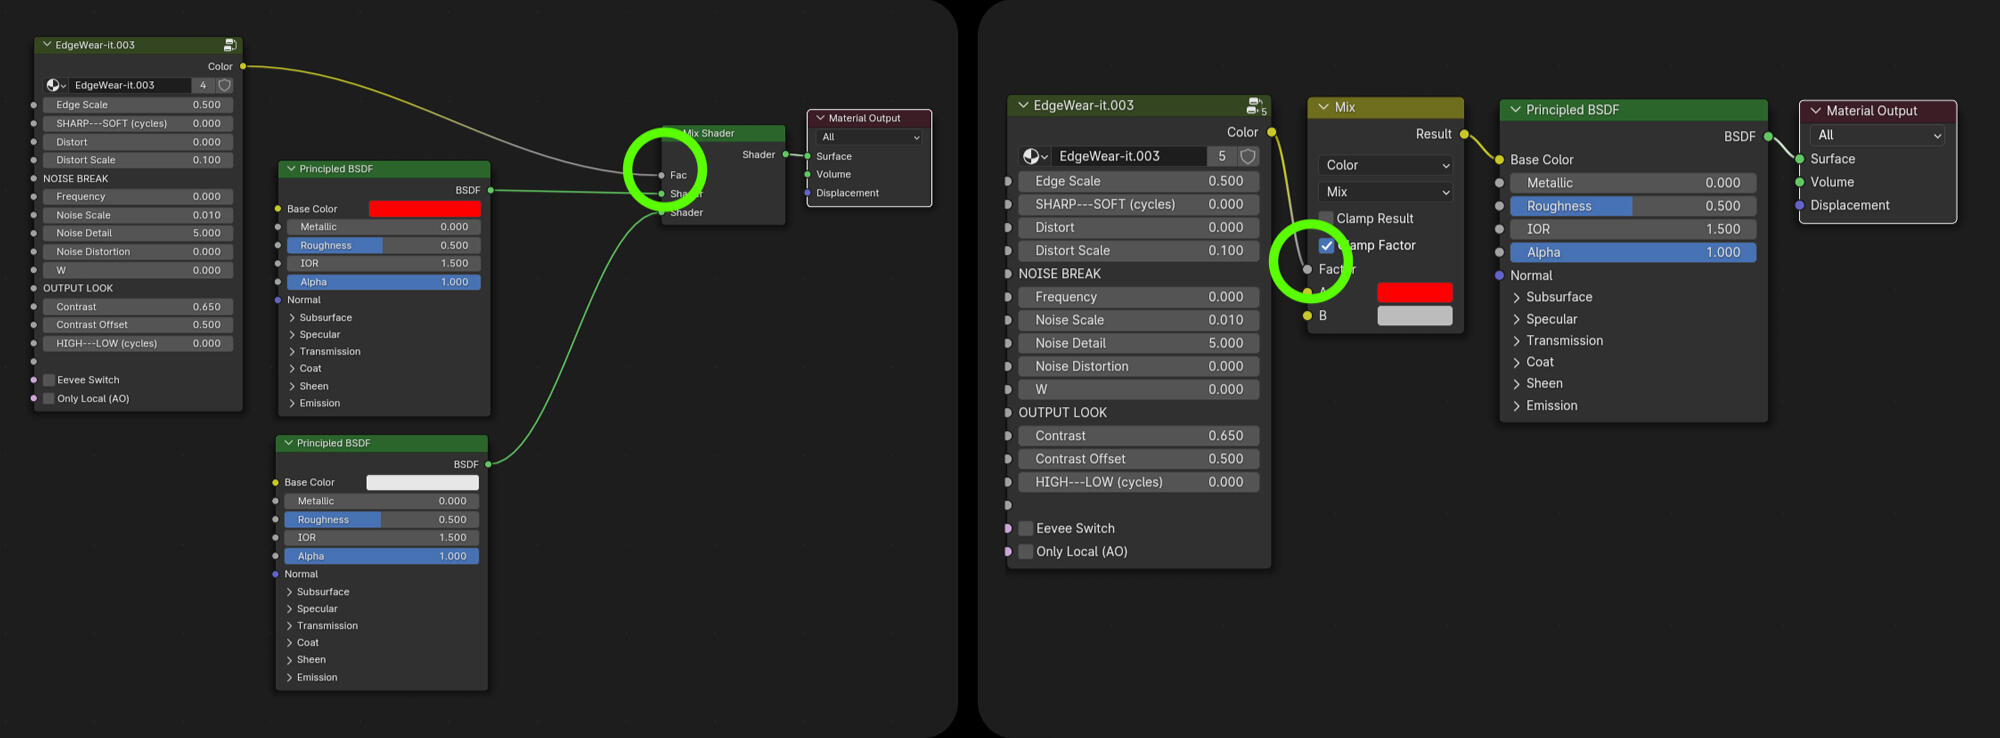
EdgeWear-it is acting as a black and white mask and most of the time is plugged in the factor of mix nodes.
• Usage Tips and Parameters
• Edge Scale
Controls how wide the edge mask is going to be.
Warning: Higher values (wider edge) might cause the mask to loose its sharpness a little.
• SHARP---SOFT (cycles)
This only applies in cycles (wont work in eevee) the slider will make the mask smoother or sharper.
• Edge Distort
Applies a noise pattern to the mask edges.
Warning: Need an Edge scale higher than 0 to be visible.
• Distort Scale
Changes the scale of the noise.
Warning: With bigger meshes (architecture, wide terrain etc.) it might occur that you need to be subtle with the values.
• Seed
Changes the noises location.
-NOISE BREAK-
• OFF---ON
0=Smooth Mask (no break), 1=Noise breaks
• Noise Scale
Control the size of the noise break.
• Noise Detail
Controls the amount of detail in the noise.
• Seed
Controls the noise location.
• Contrast
Controls the noise contrast.
-OUTPUT LOOK-
• HIGH---LOW (cycles)
This only applies in cycles (not needed in eevee) this sliders fixes some displays error of the edgewear mask but also give a better control over the look of it.
Warning: On higher polycount meshes the HIGH setting works best but the LOW one is also nice, it gives a different look. While using it on low polycount meshes the LOW setting is recommended, if the slider is more toward the HIGH artefacts will appear..
• Contrast
Reduce the distance between the white value and dark value making higher contrasts.
Tip: Check the GIF below.
• Contrast offset
Shift the contrast toward white values or dark values.
Tip: Check the GIF below.

• Eevee Switch
Switch the node to a version optimised for eevee.
• Only Local
Other objects AO will not affect the node fx.
• Advanced/Creative Applications
Hyper-Realistic Wear and Tear
Use EdgeWear-It to add fine details to worn or aged surfaces for enhanced realism:
- Simulate paint chipping on metallic or wooden objects to show prolonged use.
- Create abrasion effects on edges of machinery, weapons, or tools.
- Add weathering to architectural elements like concrete corners, brick edges, or roof tiles.
Troubleshooting:
•In Eevee: If the effect isn't displaying properly adjust the clip start and end of your perspective camera in the camera settings or View panel of the 3D viewport. The EdgeWear node works on AO for eevee.
•Depending on the size of the scene/object the sliders values will have to be adjusted accordingly.
GroundGrowth-it
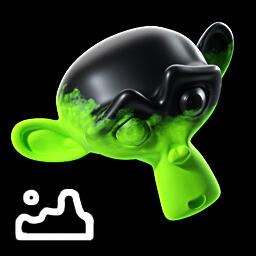
A classic yet essential tool!
Generate a mask based on the lower part of your mesh for realistic ground-growth effects.
• Placement in the shader
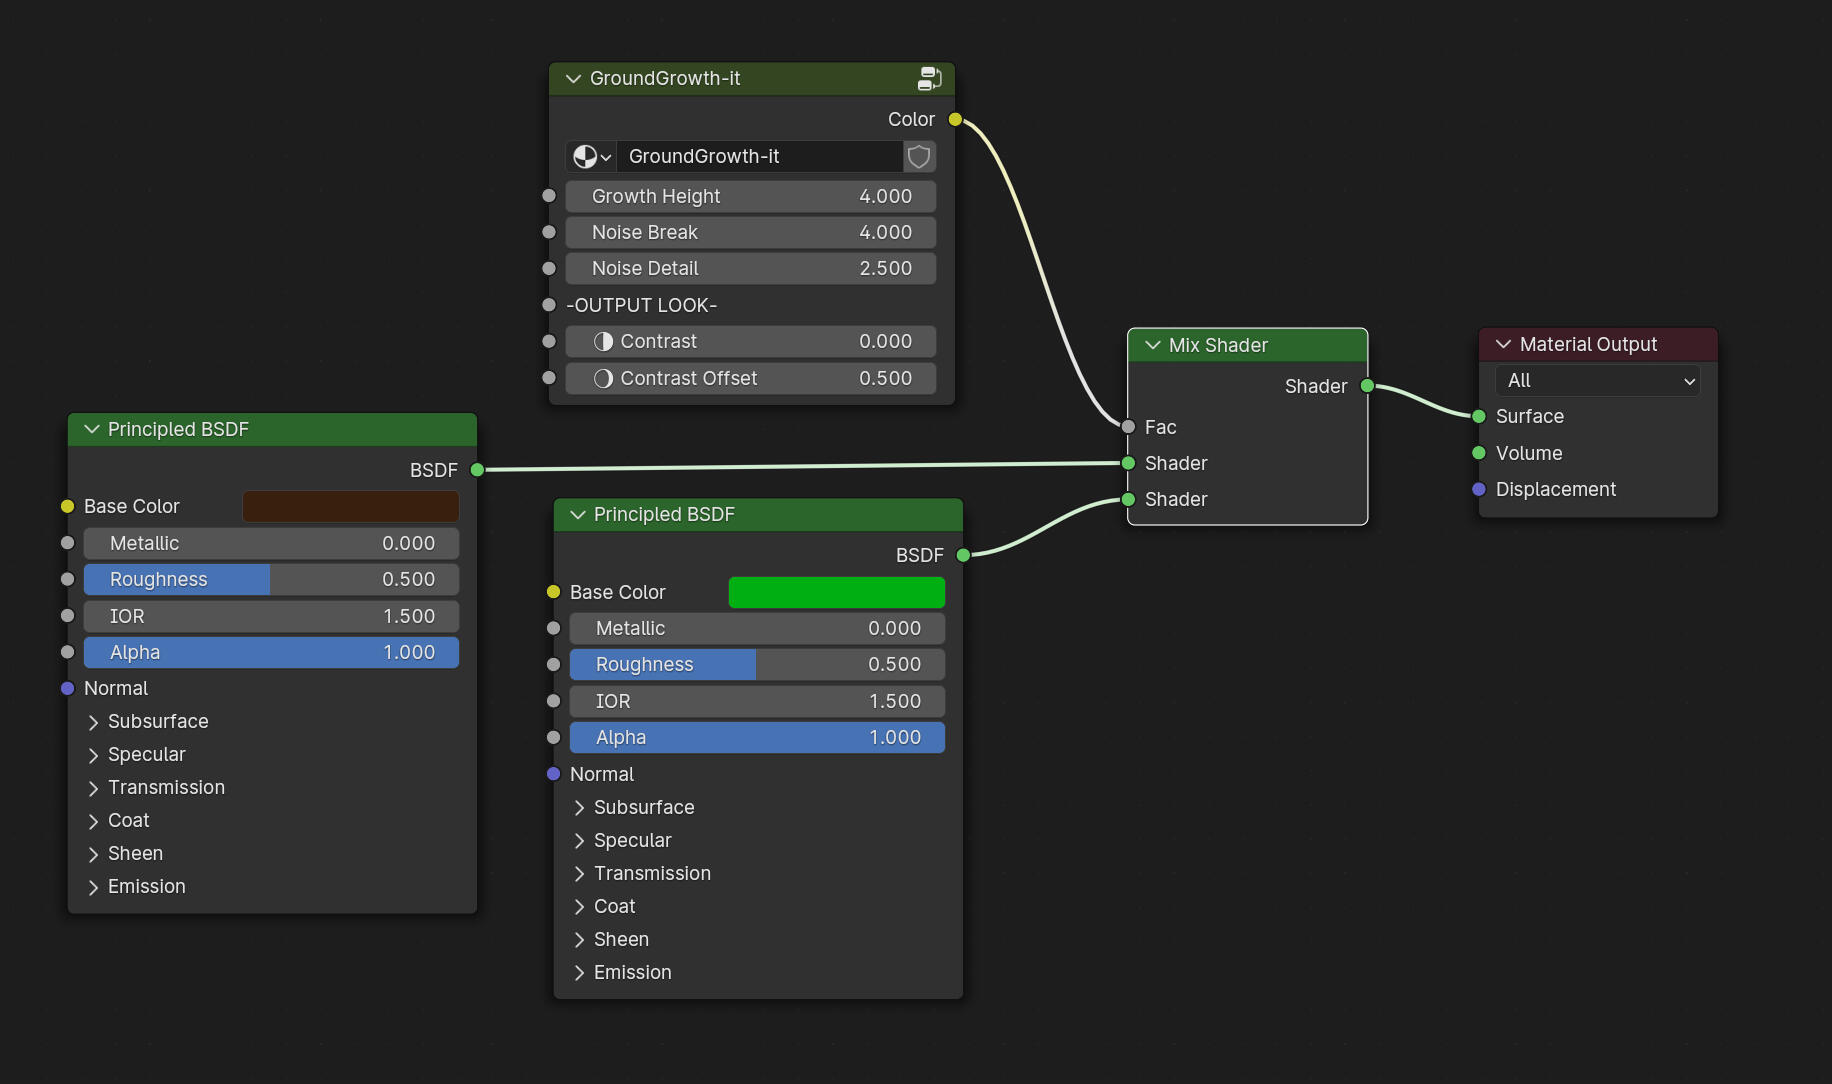
GroundGrowth-it is acting as a mask, usually comes in the Factor on mix nodes like the Mix Shader or Mix Color.
• Usage Tips and Parameters
• Growth Height
Controls the height of the mask. Lower values will make the mask closer to the bottom part of the mesh.
• Noise Break
Controls the scale of the main Noise shape.
• Random Detail
Adds a micro detailed noise for more realism.
-OUTPUT LOOK-
• Contrast
Reduce the distance between the white value and dark value making higher contrasts.
Tip: Check the GIF below.
• Contrast offset
Shift the contrast toward white values or dark values.
Tip: Check the GIF below.

• Advanced/Creative Applications
• Natural Growth Effects
- Simulate moss, grass, or dirt buildup at the base of walls, rocks, or trees for realistic environmental details.
- Create snow accumulation or mud splashes on the lower parts of objects for seasonal or weathered effects.
- Add corrosion or rust creeping up from the bottom of metallic surfaces for aged and worn looks.
Scratch-it
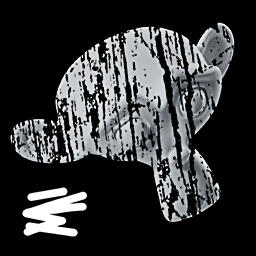
No need to search for scratch textures—this node is pre-configured to add realistic scratches to your materials.
• Placement in the shader
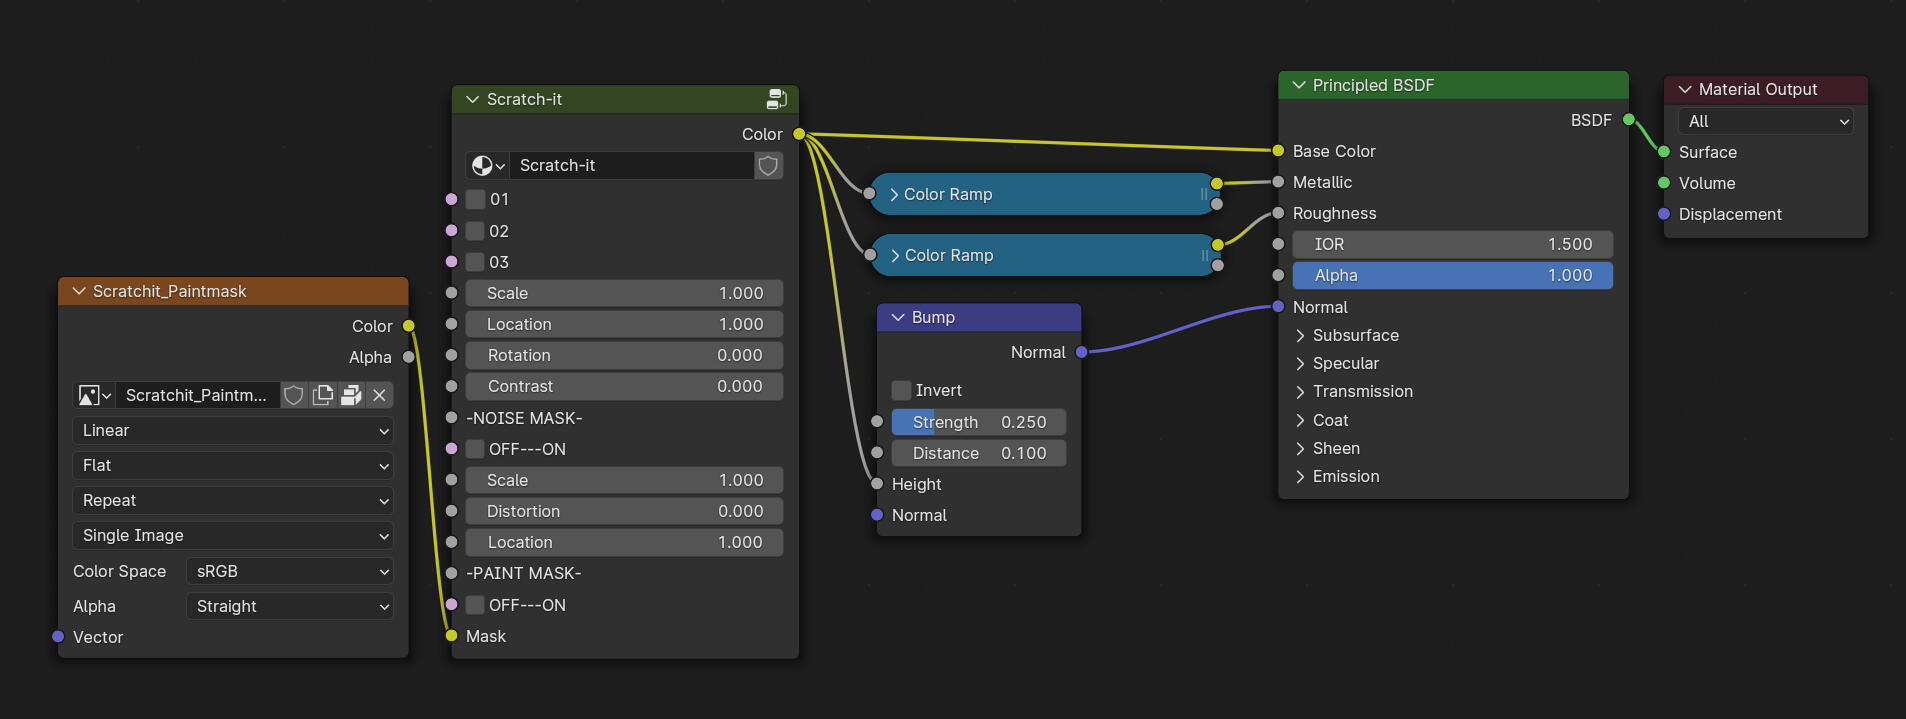
Scratch-it is a black and white image. You can use it as a mask but also directly in the principled BSDF.
• Usage Tips and Parameters
By default Scratch-it comes with 4 scratched image textures.
• 01
Other scratch image texture.
• 02
Other scratch image texture.
• 03
Other scratch image texture.
• Scale
Controls the scale of the texture.
• Location
Controls the location of the texture.
• Rotation
Controls the rotation of the texture.
• Contrast
Controls the contrast of the texture.
-NOISE BREAK-
• OFF---ON
Activate the noise break. It will partially hide the texture.
• Scale
Controls the scale of the noise break.
• Distorsion
Controls the distorsion of the noise break.
• Seed
Controls the location of the noise break.
-PAINT MASK-
• OFF---ON
Enable the possibility to paint a mask for a better control of the scratches placement.
Tip: You need to unwrap the UVs to use a texture map. Don't forget to save the image texture when you're done.
• Mask
Scratch-it comes with an already plugged image texture in the Mask input.
• Advanced/Creative Applications
• Realistic Surface Damage
- Add fine scratches to metals, plastics, or painted surfaces for realistic wear and tear effects.
- Simulate brushed metal patterns or scuff marks on floors, machinery, or weapons.
- Combine with Edgewear-It to make scratches appear more concentrated along edges and corners.
Rough-it
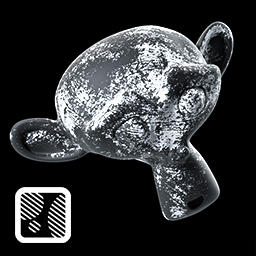
Similar to Scratch-it, Rough-it provides multiple roughness maps that easily integrate into your shader node tree.
• Placement in the shader
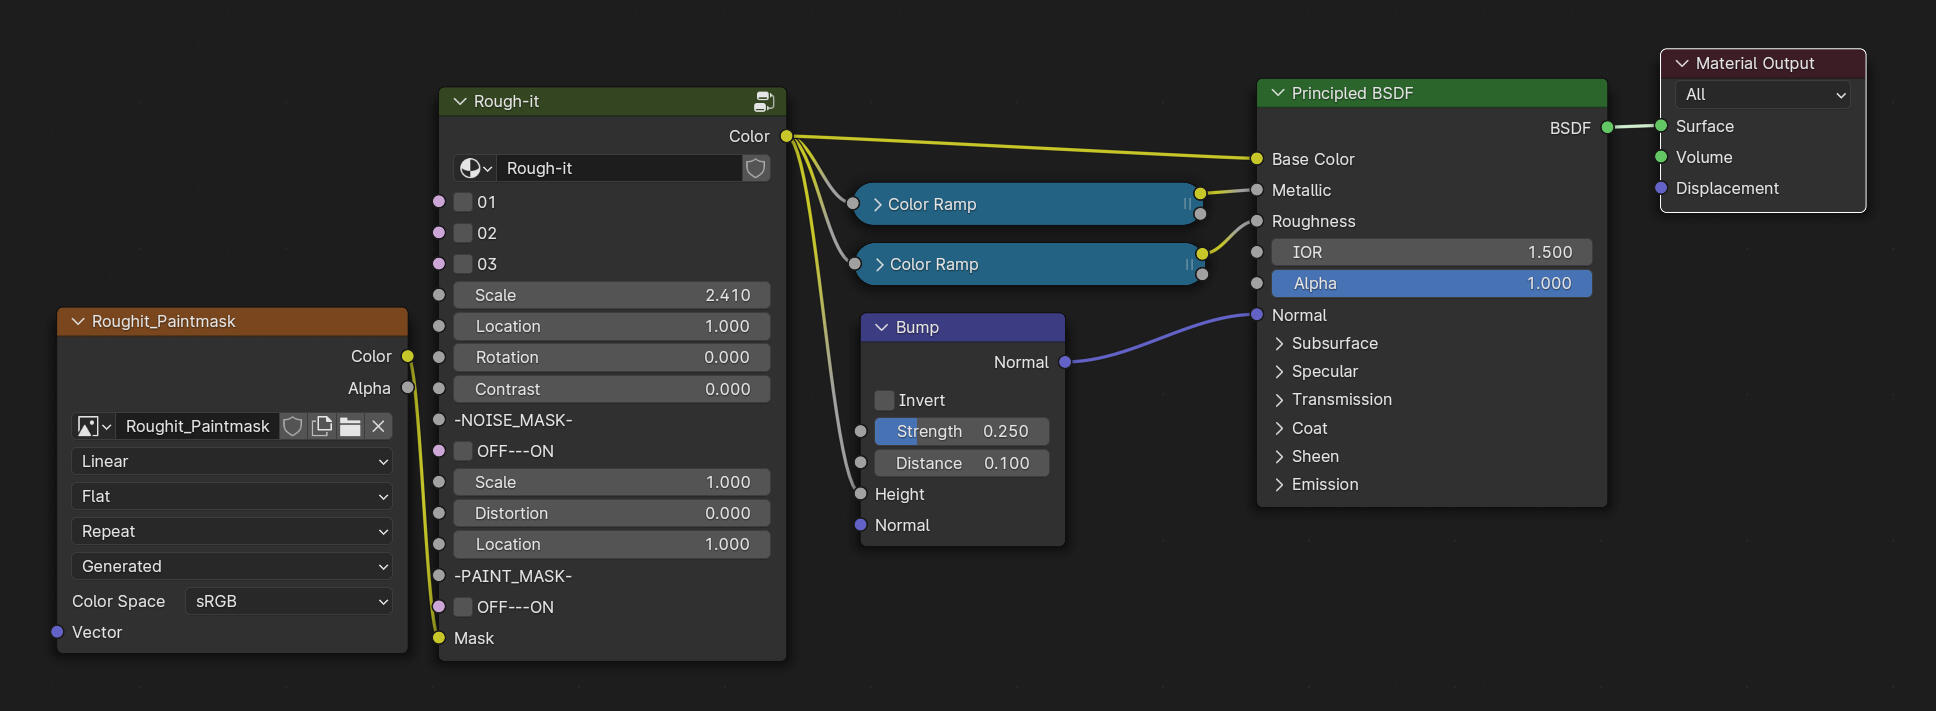
Rough-it is a black and white image. You can use it as a mask but also directly in the principled BSDF.
• Usage Tips and Parameters
By default Rough-it comes with 4 scratched image textures.
• 01
Other rough image texture.
• 02
Other rough image texture.
• 03
Other rough image texture.
• Scale
Controls the scale of the texture.
• Location
Controls the location of the texture.
• Rotation
Controls the rotation of the texture.
• Contrast
Controls the contrast of the texture.
-NOISE BREAK-
• OFF---ON
Activate the noise break. It will partially hide the texture.
• Scale
Controls the scale of the noise break.
• Distorsion
Controls the distorsion of the noise break.
• Seed
Controls the location of the noise break.
-PAINT MASK-
• OFF---ON
Enable the possibility to paint a mask for a better control of the roughness placement.
Tip: You need to unwrap the UVs to use a texture map. Don't forget to save the image texture when you're done.
• Mask
Rough-it comes with an already plugged image texture in the Mask input.
• Advanced/Creative Applications
• Realistic Surface Imperfections
- Add subtle roughness variations to materials like glass, metals, or plastics for more natural reflections.
- Simulate weathered surfaces such as worn leather, scratched wood, or scuffed floors without relying on external textures.
- Create frosted glass or gritty metals for industrial and architectural scenes.
Random90°-it
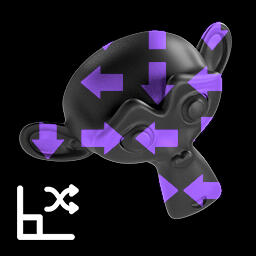
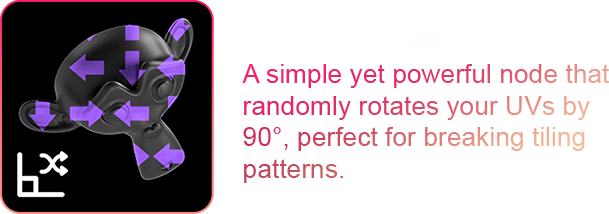
A simple yet powerful node that randomly rotates your UVs by 90°, perfect for breaking tiling patterns.
• Placement in the shader
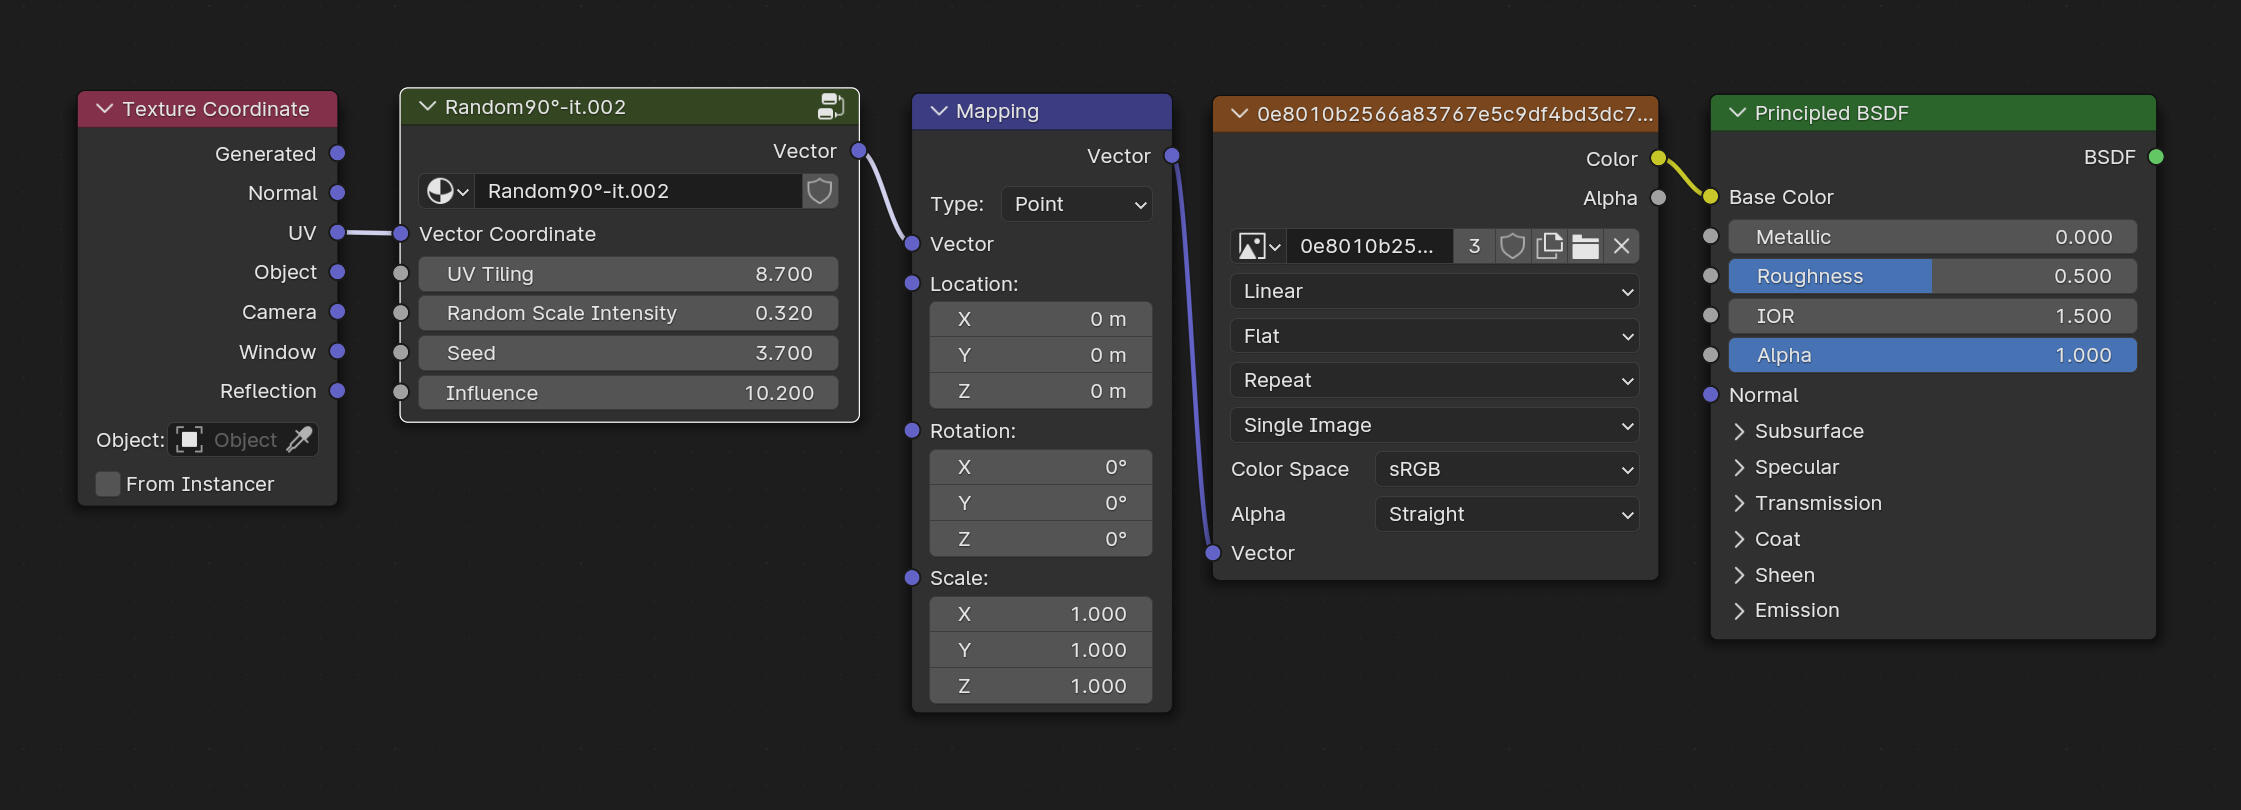
Random90°-it is acting on UVs. It comes between the "Texture Coordinate" node and the "Mapping" one..
• Usage Tips and Parameters
• Vector Coordinate
Connect Texture Coodinate output here.
• UV Tiling
Controls the repetition of your texture.
• Random Scale Intensity
Controls how much of scale variation you want to have.
• Seed
Offsets the scale variations result.
• Influence
How much the node affects the texture UV's.
• Advanced/Creative Applications
• Seamless Tile Variation
Fix visible tiling patterns on floors, walls, or fabrics by randomly rotating textures at 90° angles. Work nice with hardsurface tileable textures.
Blur-it
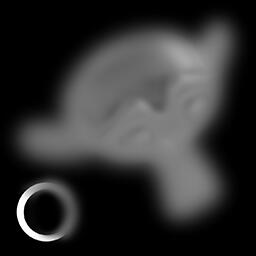
Some textures are too sharp—this node softens them for a smoother look, all within Blender.
• Placement in the shader
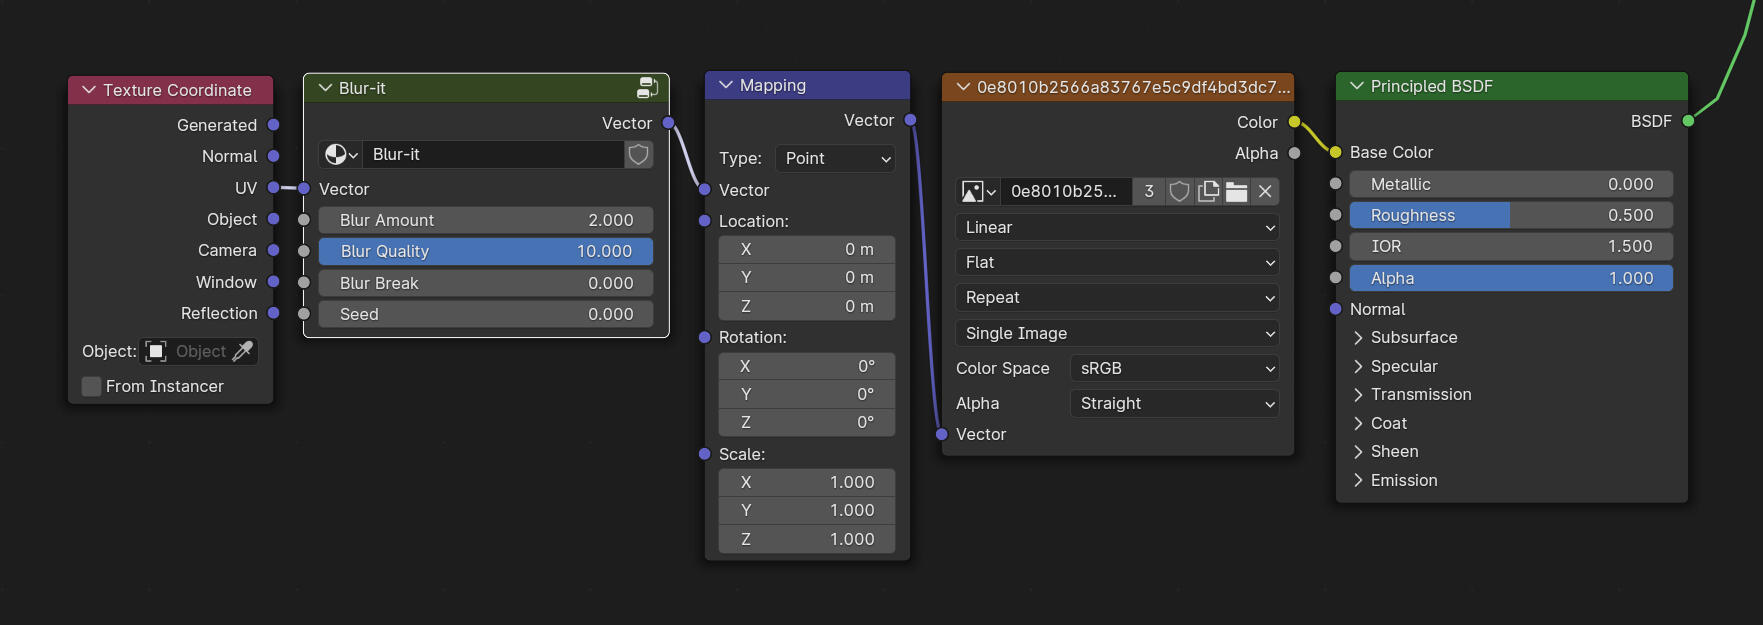
Blur-it is acting on UVs. It comes between the "Texture Coordinate" node and the "Mapping" one..
• Usage Tips and Parameters
• Vector Coordinate
Connect Texture Coodinate output here.
• Blur Amount
How much blur do you want?
• Blur Quality
Raw or refined.
• Blur Break
Will mask parts of the blur.
Tip: Nice to add heat distorsion effect to a material, especially when its animated.
• Seed
Offsets the noise break result.
• Advanced/Creative Applications
• Soften Harsh Textures
- Reduce sharp noise patterns or overly crisp details in procedural textures.
- Smooth out rough transitions in bump or displacement maps for more natural surfaces.
- Perfect for fabric, skin, or organic materials that require subtle gradients.
Warp-it
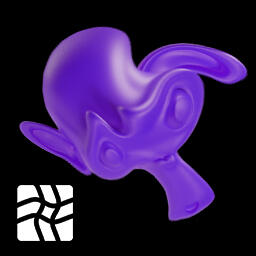
The ultimate nodegroup to torn,warp,bend,rip,brutalize,
twist,torture your textures for creative and dynamic effects.
• Placement in the shader
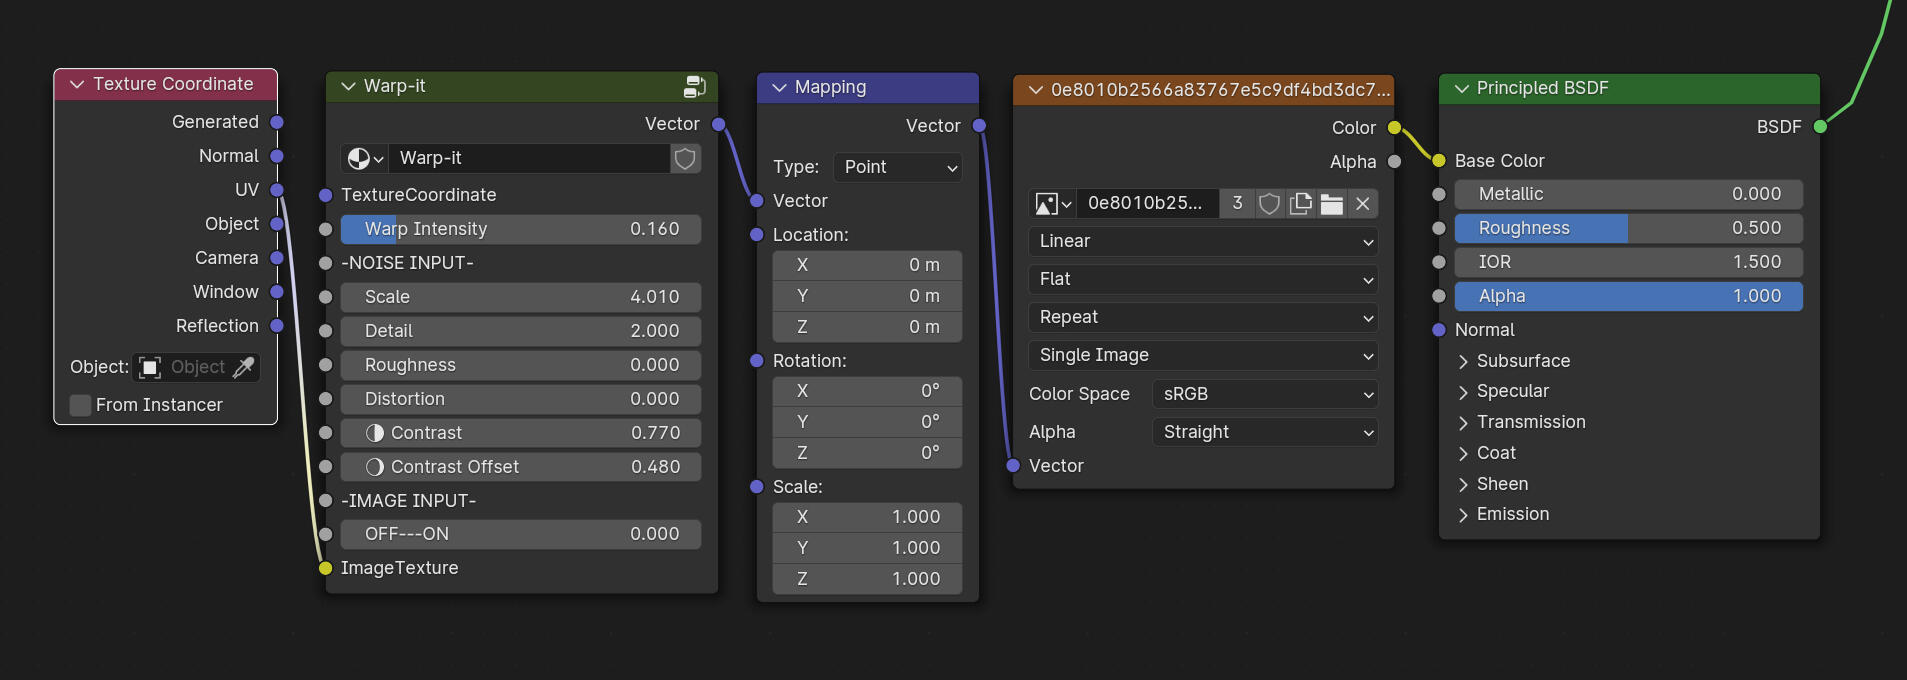
Warp-it is acting on UVs. It comes between the "Texture Coordinate" node and the "Mapping" one..
• Usage Tips and Parameters
• Vector Coordinate
Connect Texture Coodinate output here.
• Warp Intensity
How much deformation do you want? This slider drives the power of the warp.
-NOISE INPUT-
• Scale
Scale of the noise.
• Detail
Will increase the details of the noise.
• Roughness
Add roughness to the noise.
• Distorsion
Distorts the noise.
• Seed
Changes the noise location
• Contrast
Reduce the distance between the white value and dark value making higher contrasts.
Tip: Check the GIF below.
• Contrast offset
Shift the contrast toward white values or dark values.
Tip: Check the GIF below.
-IMAGE INPUT-
• OFF---ON
Actives the ability to use an image of your choice.
Tip: You can also plug a procedural noise here for more control. You can also use Pattern Designer to have even more crazy results. Open the link below for more infos.
• Image Texture
Connect your image texture right here.
• Advanced/Creative Applications
• Glitch and Sci-Fi Effects
- Build glitchy digital artifacts for futuristic or cyberpunk designs.
- Animate distortion patterns to simulate holographic interference or digital errors.
- Combine with Anim-It for pulsating and shifting visuals in VFX sequences.• Fantasy and Abstract Looks
- Design alien materials, portals, or magical energy effects by twisting patterns and colors.
- Create dreamlike textures for surreal scenes, perfect for fantasy environments.
- Use with Blur-It to make soft and flowing patterns ideal for ethereal looks.• Motion and Animation Effects
- Animate warping patterns for moving fabrics, smoke, or plasma effects.
- Use oscillation patterns for vibrating textures or undulating surfaces.
- Combine with Anim-It to create looping waveforms or pulsing textures.
HDRIMix-it
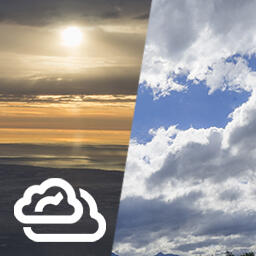
Blend multiple HDRIs for advanced lighting control! Light your scene with one, display another for full artistic freedom.
• Placement in the shader
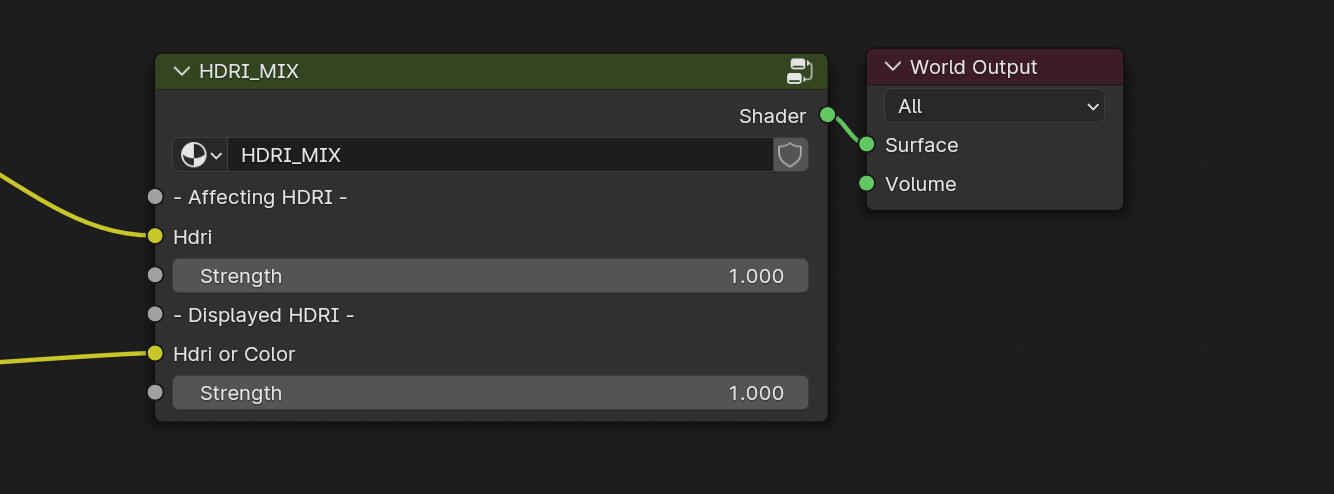
HDRIMix-it output goes straight into the world output Surface.
• Usage Tips and Parameters
-AFFECTING HDRI-
• Hdri
Input for Hdri texture or any texture (can be a color too)
• Strength
Intensity of the input.
-DISPLAYED HDRI-
• Hdri or Color
You can plug an other hdri or a color
• Strength
Intensity of the input.
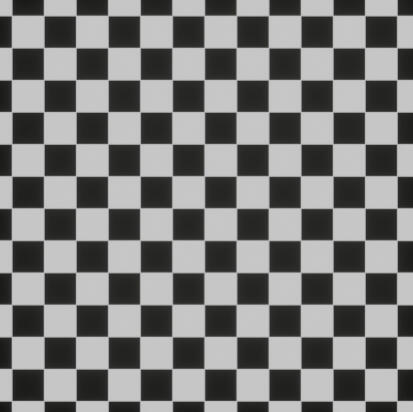
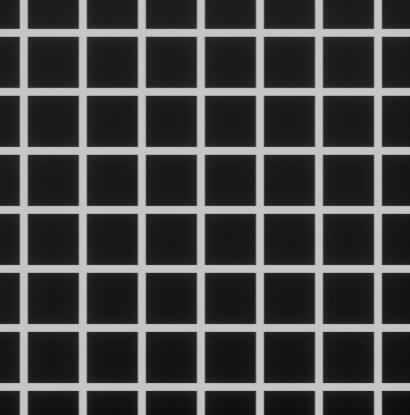
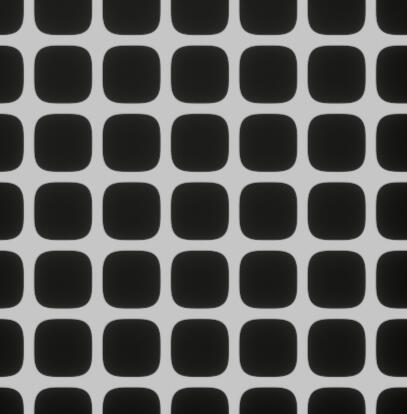
Motif-it
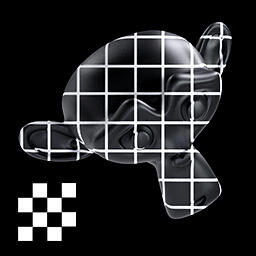
A toolbox of classic and modern graphical patterns. Grids, shapes like hex, squares, dots... and motifs to add instant design flair.
• Placement in the shader
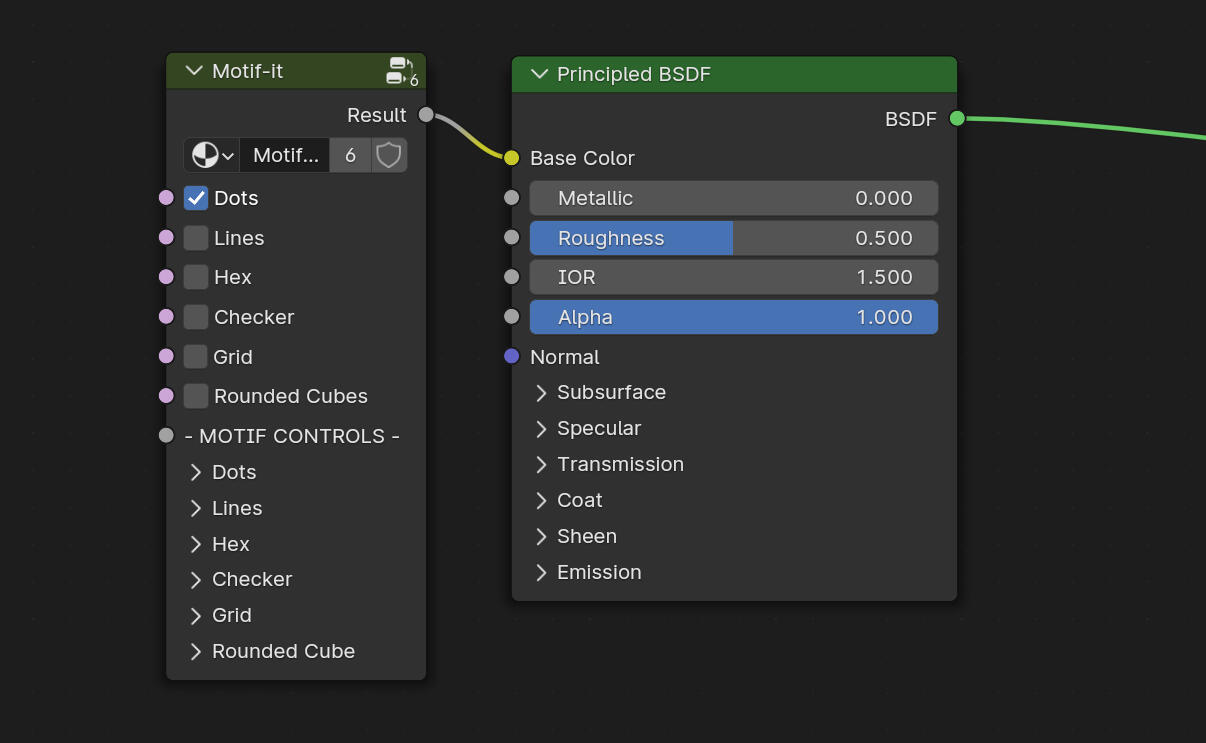
• Usage Tips and Parameters
-MOTIFS-
• Dots
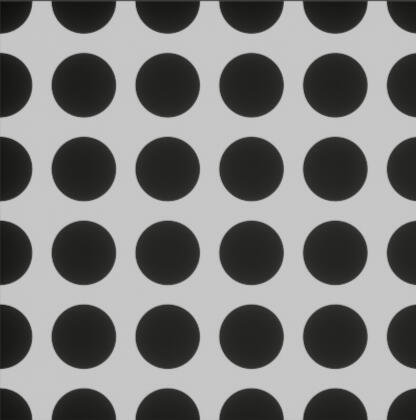
• Lines
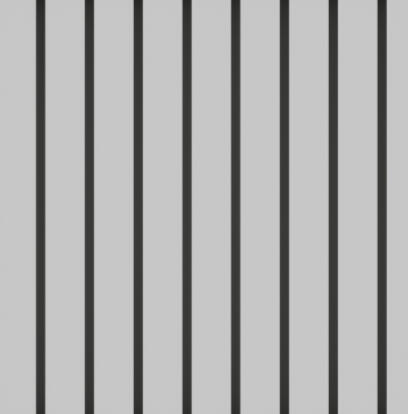
• Hex
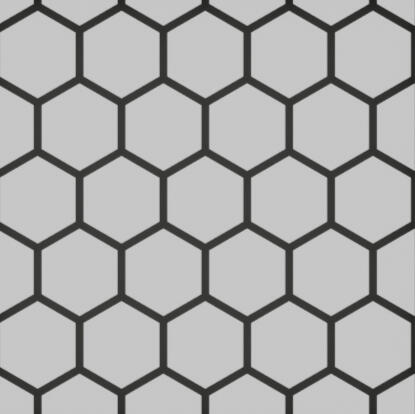
• Checker
• Grid
• Rounded Cubes
-MOTIF CONTROLS-
• Scale
Overall Scale of the motif
• Thickness
Increase or decrease motifs
• Randomness
Makes random tiles
• Distorsion
Disrupt the motif
• 45°
Turns at a 45 degres the motif
• 90°
Turns at a 90 degres the motif
NightSky-it
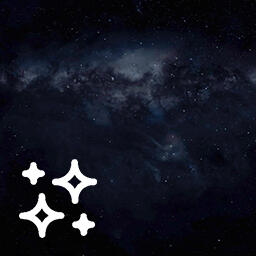
Generate a fully procedural night sky HDRI. Stars, atmosphere... no textures needed.
• Placement in the shader
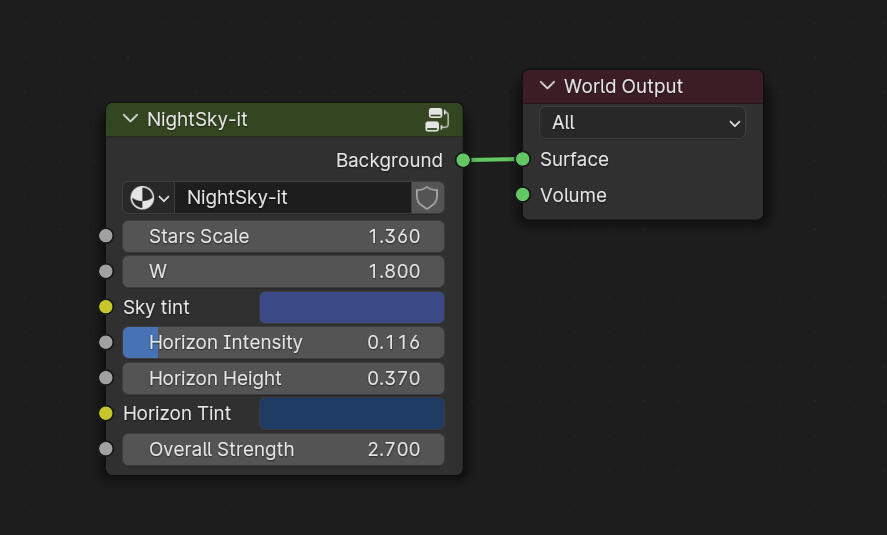
NightSky-it output goes straight into the world output Surface.
• Usage Tips and Parameters
• Stars Scale
Controls the scale of the overall Stars sky.
• Seed
Controls the random scattering of stars sky.
• Sky tint
Overall sky color.
• Horizon Intensity
Horizon gradient Luminosity.
• Horizon Height
Horizon gradient size.
• Horizon Tint
Horizon gradient color.
• Overall Strength
Intensity/luminosity of the sky.
Puddle-it
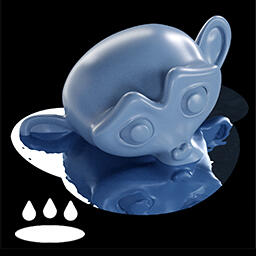
Drop in natural, procedural puddles with depth and shapes controls. Perfect for rainy streets or wet surfaces.
• Placement in the shader
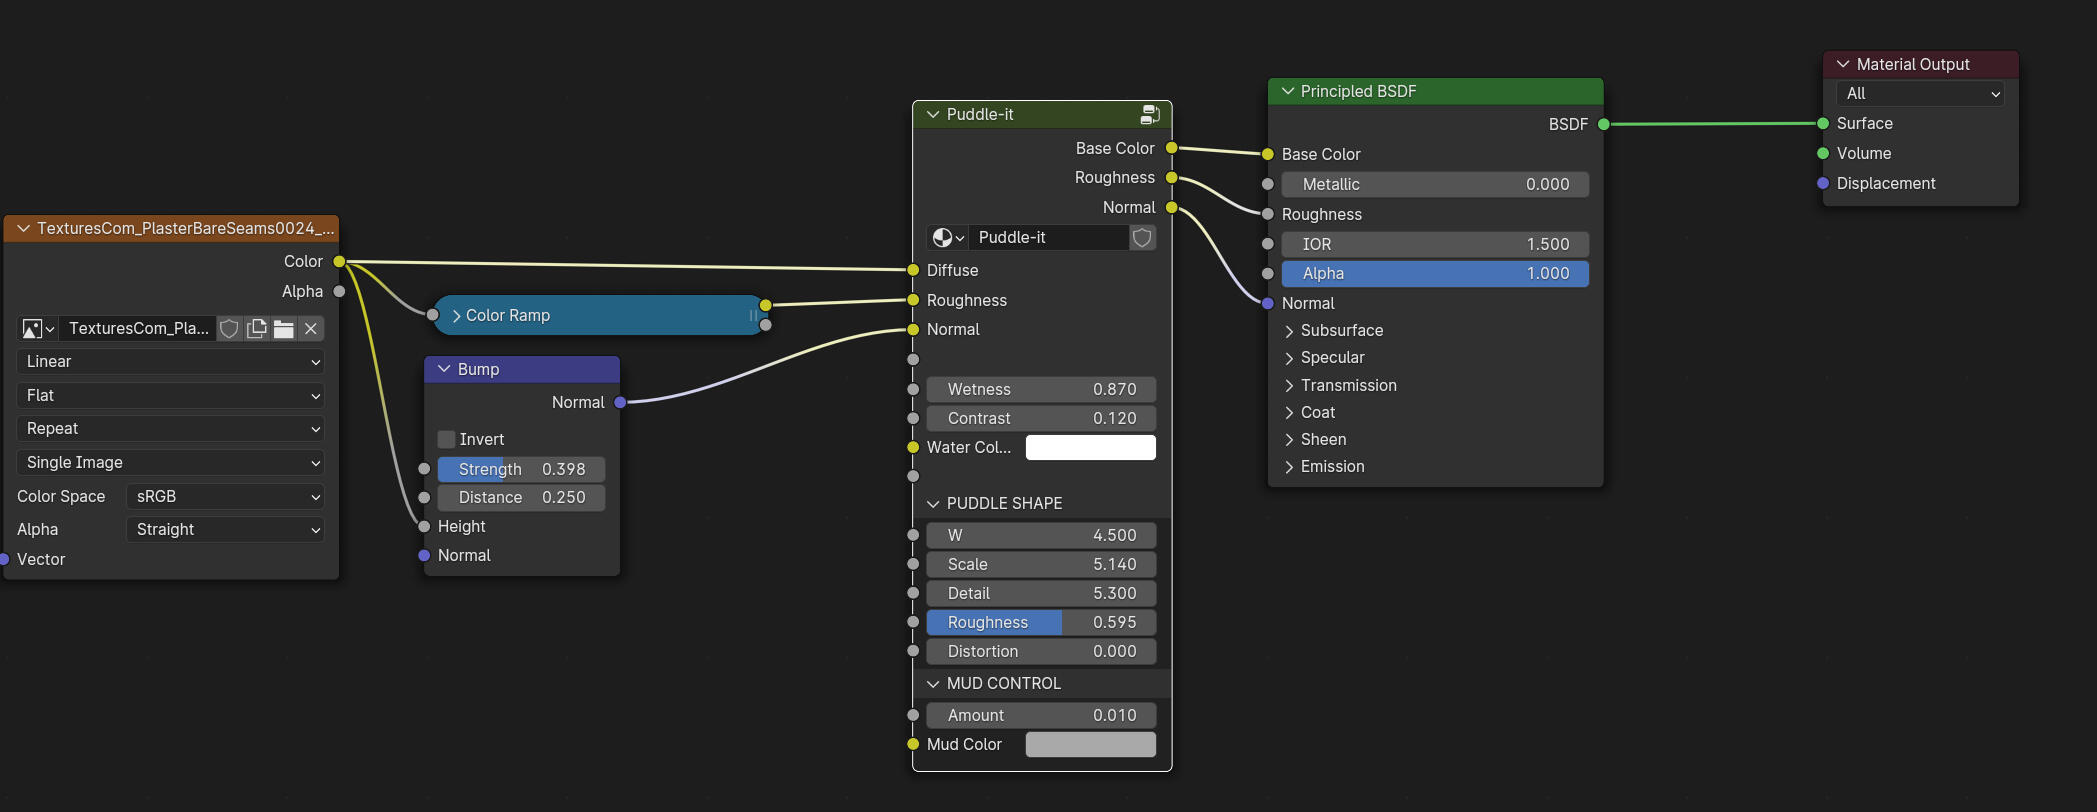
Puddle-it should come right before the principled bsdf, as the last layer to your material.
• Usage Tips and Parameters
-AFFECTING HDRI-
• Diffuse
Your last node for the Base Color should go in there, the Diffuse output in the Base color of the principled Color.
• Roughness
Same as the Diffuse/BaseColor but for the roughness
• Normal
Same as the Diffuse/BaseColor but for the normal
• Wetness
How much rain on the surface
• Constrast
Controls the thickness of wet border of the puddle
• Water Color
Is it water, blood, or mud?... Creative input to choose color for your puddles.
-PUDDLE SHAPE-
• W
Seed of the noise
• Scale
Size of the noise
• Detail
Add details/complexity to the puddle
• Roughness
Makes the edges of the noise more noisy
• Distorsion
Warps the noise
-MUD CONTROL-
• Amount
How much mud do you want in your water...
• Mud Color
Controls mud color.
Stylise-it
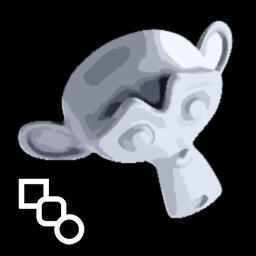
Apply a posterization effect onto any texture.
• Placement in the shader
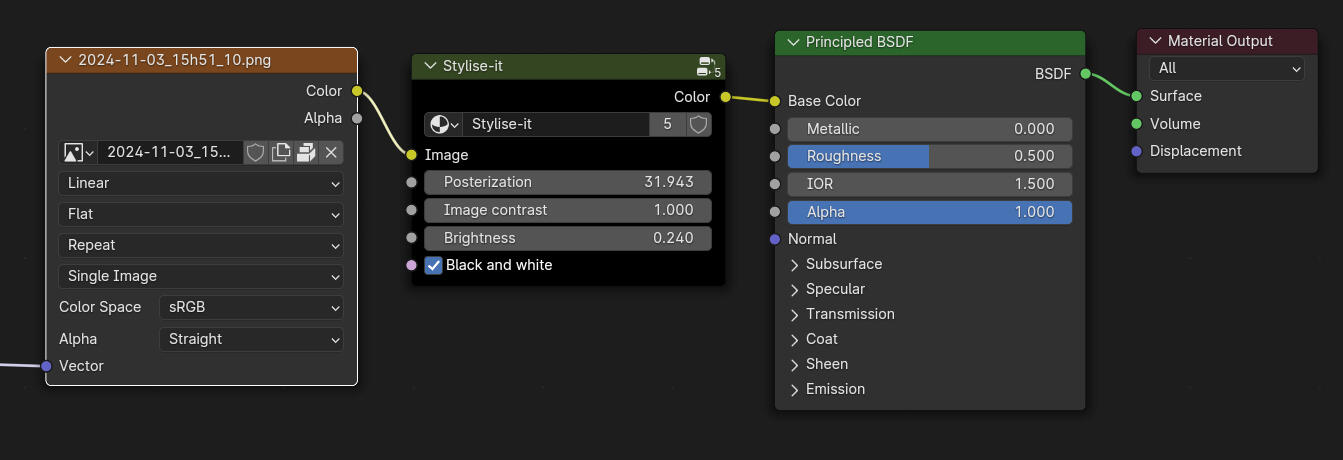
• Usage Tips and Parameters
-Stylise-it NODE-
• Image
Plug your texture output to apply effect
• Posterization
How much of the effect you want.
• Image contrast
Let you adjust the contrast of your texture to better control le posterization look.
• Brightness
Let you adjust the brightness of your texture to better control le posterization look.
• Black and White
Turn the look into a monochromatic look.
Anim-it
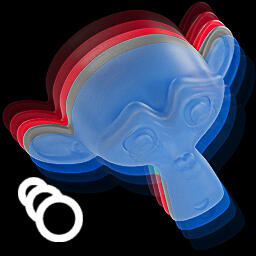
A super handy node to animate values without the hassle. Set up linear moves, oscillations, glitches, & more in no time.
• Placement in the shader
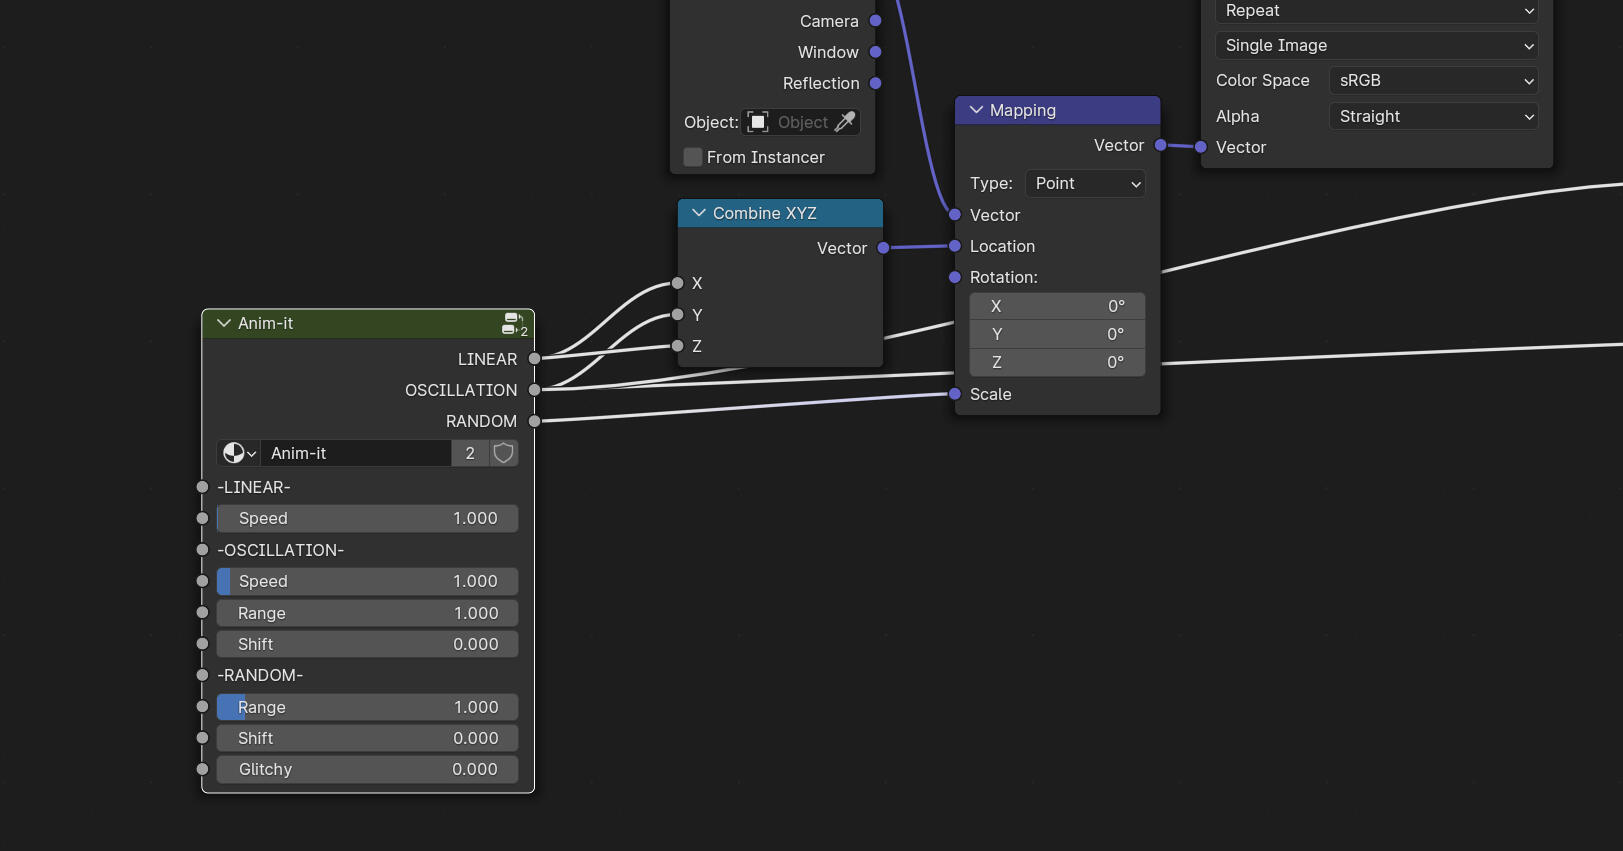
Anim-it can be plugged in any value/sliders.
• Usage Tips and Parameters
EVEN IF THE SLIDERS VALUES ARE LOCKED, you can enter any value manually it will unable the lock.
-LINEAR-
• Speed
Increase or decrease the speed of the animation. Negative values will change the direction of the animation.
Tip: Hold "Shift" to adjust with finesse the value when needed. you can also enter values manually. / will divide your actual value, * will multiply it.
-OSCILLATION-
• Speed
Increase or decrease the speed of the animation. Negative values will change the direction of the animation.
Tip: Hold "Shift" to adjust with finesse the value when needed. you can also enter values manually. "/" will divide your actual value, "" will multiply it.*
• Range
The Range option will animate the slider between 2 values with a slight ease-in-out. You can choose how distant are the values.
(thus how wide or narrow is the range)
• Shift
Offsets both values.
-RANDOM-
• Range
The Range option will animate the slider between 2 values with a slight ease-in-out. You can choose how distant are the values.
(thus how wide or narrow is the range)
• Shift
Offsets both values.
• Glitchy
Will remove in between frames making your animation glitchy. (stepped animation) Perfect for glitches on UI screens but for other stuffs too.
Tip: Increase the Range to make this effect more visible.
• Advanced/Creative Applications
• Procedural Motion Graphics and Effects
- Animate pulsating patterns, flowing textures, or shifting gradients for sci-fi panels, holograms, and UI elements.
- Create rippling water, moving fog, or lava flows for dynamic environmental effects.
- Simulate flickering lights or unstable energy fields for cinematic or abstract designs.• Organic and Stylized Animation
- Add growth effects like moss spreading, cracks forming, or plants growing.
- Animate waves, oscillations, or breathing textures for organic, biological materials.
- Perfect for abstract motion art, liquid ink effects, or morphing shapes with seamless looping.• Randomized Glitches and Chaos
- Introduce glitch effects, jitter, or irregular flickers for futuristic and digital designs.
- Simulate data corruption, screen errors, or unstable patterns in sci-fi renders.
- Combine with Destruct-It for dynamic destruction effects, explosions, and chaotic animations.
Limitations
While Node-it offers a wide range of efficient tools for shader creation, there are a few limitations to keep in mind.
The addon is designed to work best with Blender’s Cycles and Eevee rendering engines, so certain nodes may not function as expected in other engines or with specialized workflows.Additionally, while Node-it aims to streamline your shader creation process, it may require a bit of familiarity with Blender’s node-based system to fully leverage its capabilities. Some nodes may also require more advanced adjustments depending on your scene complexity.
For best results, ensure you are using Blender 4.0x or above, as compatibility with earlier versions may be limited.
Rendering time will of course depends on the machine you use.
Bug report
Please share with me any bugs, glitches, or any feedback you think I should know. :)
Feel free to fill out this form and let me know what you are encountering. Please include as much information as possible, along with your correct email address in case I need to get in touch with you for more details.Thank you, and I apologize for any inconveniences you may be encountering.
Changelogs
v1.5.0 - XX/09/2025• Release of 5 new nodes including : Puddle-it + Motif-it + NightSky-it + HDRIMix-it + Stylise-it
• Adaptability of node-it for the last Blender Versions.
v1.0.0 - 15/01/2025• Release


